Tile Roof Installation Guide
This comprehensive guide details tile roofing installation, covering materials, structure prep, and sealing with products like EUROTOP membrane and VILPE XL sets․
Tile roofing represents a durable and aesthetically pleasing choice for many structures, offering longevity and classic appeal․ This guide provides a detailed overview of the installation process, crucial for both professionals and informed homeowners․ Proper installation ensures weather resistance and maximizes the lifespan of the roof․
Understanding the nuances of tile roofing, from material selection to load transfer, is paramount․ Japanese roof-supporting systems differ, highlighting the need for tailored approaches․ This guide references resources like the EUROTOP Membrane Installation Manual and Gerard Roofing installation guides, emphasizing the importance of following manufacturer instructions for optimal results and waterproofing․
Types of Tile Roofing Materials
Tile roofing encompasses a variety of materials, each with unique characteristics impacting installation and longevity․ Common options include clay, concrete, and slate tiles, each demanding specific techniques․ Clay tiles offer traditional aesthetics, while concrete tiles provide cost-effectiveness and durability․ Slate, known for its exceptional lifespan, requires specialized handling․
Selecting the appropriate material depends on factors like climate, budget, and architectural style․ Installation guides, such as those from Gerard Roofing, often detail material-specific procedures․ Understanding these differences is crucial for a successful and lasting roof installation, ensuring proper load transfer to the wood frame․
Clay Tiles
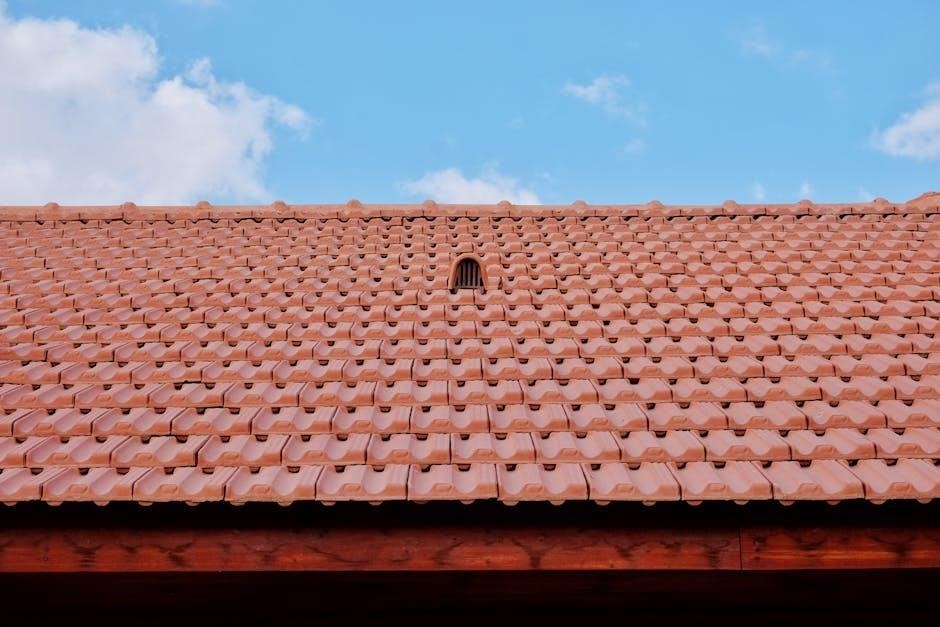
Clay tiles represent a classic roofing choice, prized for their aesthetic appeal and durability․ Installation requires careful handling due to their fragility, demanding experienced installers․ Proper roof pitch is essential, as clay tiles are heavier than some alternatives, impacting structural load considerations․
Manufacturer instructions, like those provided by Gerard Roofing, are vital for correct fastening and layout․ Clay tile installation often involves specific underlayment requirements for optimal waterproofing․ Ensuring proper overlap and sealing, potentially with a membrane like EUROTOP, is crucial for preventing leaks and maximizing the roof’s lifespan․
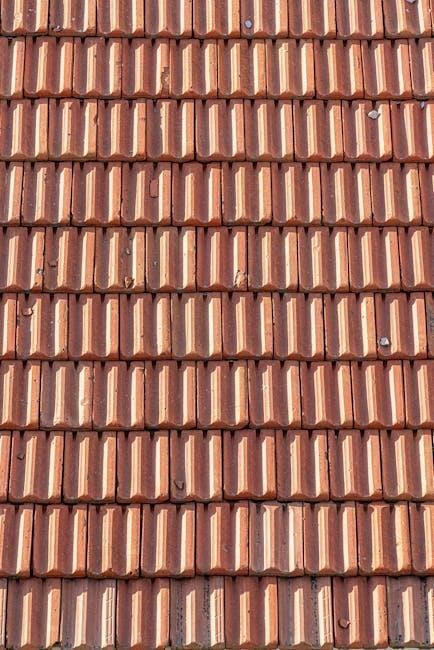
Concrete Tiles
Concrete tiles offer a cost-effective and versatile roofing solution, mimicking the appearance of clay or slate․ They are heavier than asphalt shingles but generally lighter than clay, requiring a structurally sound roof deck․ Installation necessitates adherence to manufacturer guidelines, particularly regarding fastening methods․
VILPE XL Concrete Tile pass-through sets are specifically designed for installations involving vents or fans․ Proper underlayment, potentially enhanced with a sealing layer like EUROTOP membrane, is critical for waterproofing․ Careful planning of tile layout and coverage is essential for a visually appealing and durable roof․
Slate Tiles
Slate tiles represent a premium roofing material, renowned for their longevity and aesthetic appeal․ However, their significant weight demands a robust roof structure capable of handling the increased load․ Installation requires specialized skills and experience due to the brittle nature of the material․
Proper roof pitch is crucial for effective water runoff with slate․ Underlayment selection and application are paramount for waterproofing, often paired with sealing membranes like EUROTOP․ Precise tile layout and secure fastening are essential for preventing slippage and ensuring a lasting, beautiful roof․
Roof Structure Preparation
Prior to tile installation, meticulous roof structure preparation is vital for long-term performance․ This begins with a thorough inspection of the roof decking, ensuring it’s structurally sound and free from rot or damage․ The supporting system, often a wood frame, must adequately transfer the roof load – particularly important with heavier tiles like slate․
Confirming proper roof pitch is equally critical for effective water shedding․ Japanese roof-supporting systems differ, highlighting the need for code compliance and structural engineering assessment․ A well-prepared structure is the foundation for a durable tile roof;
Inspecting the Roof Decking
A detailed inspection of the roof decking is the first step in preparation․ Look for signs of water damage, rot, or structural weakness in the wood sheathing – typically boards, plywood, or OSB․ Any compromised areas must be replaced before proceeding․ Ensure the decking is securely fastened to the rafters, providing a stable base for the tile system․
Verify the decking’s thickness meets local building codes and tile manufacturer specifications․ Proper decking ensures adequate support and prevents future issues related to tile cracking or displacement․ This foundational step is crucial for longevity․
Ensuring Proper Roof Pitch
Tile roofs require a specific minimum roof pitch for effective water shedding and to prevent issues like tile slippage or water infiltration․ Consult local building codes and the tile manufacturer’s instructions to determine the appropriate pitch for your chosen tile type․
A pitch that is too shallow may lead to water pooling and leaks, while an excessively steep pitch can create challenges with tile installation and fastening․ Accurate pitch assessment is vital; adjustments may be needed to the roof structure to meet requirements․
Underlayment Installation
Proper underlayment is crucial for waterproofing a tile roof system, acting as a secondary barrier against moisture․ Selecting the right underlayment – often a breathable membrane – is the first step, ensuring compatibility with the tile and climate․
Installation involves overlapping seams according to manufacturer specifications and securely sealing them to prevent water penetration․ The underlayment should be applied smoothly and consistently over the entire roof deck, providing a continuous protective layer beneath the tiles․
Choosing the Right Underlayment
Selecting the appropriate underlayment is vital for long-term tile roof performance․ Consider the roof’s pitch and local climate; steeper slopes and wetter regions demand more robust waterproofing․ Breathable membranes are often preferred, allowing moisture vapor to escape from the attic, preventing rot․
Materials like synthetic underlayments offer superior tear resistance and UV protection compared to traditional felt paper․ Compatibility with the chosen tile material and adherence to local building codes are also key factors in the selection process, ensuring a reliable and code-compliant installation․
Applying the Underlayment – Overlap and Sealing
Proper underlayment application is crucial for a watertight tile roof․ Overlap seams by a minimum of 6 inches, or as specified by the manufacturer, ensuring complete coverage․ Secure the underlayment with appropriate roofing nails or staples, maintaining consistent spacing․
Seal all overlaps and around penetrations – vents, skylights – with a compatible roofing sealant․ This creates a continuous waterproof barrier․ Pay close attention to detail, as even small gaps can compromise the roof’s integrity, leading to leaks and structural damage over time․
Tile Layout and Planning
Careful planning is essential before commencing tile installation․ Begin by determining optimal tile starting points, considering aesthetics and minimizing tile cuts․ Accurate calculation of tile coverage is vital to avoid shortages or excessive waste, impacting project costs․
Account for roof geometry, including hips, valleys, and ridges․ A detailed layout plan ensures a visually appealing and structurally sound finished roof․ Proper planning also facilitates efficient installation, reducing labor time and potential errors․ Refer to manufacturer guidelines for specific layout recommendations․
Determining Tile Starting Points
Selecting the correct starting point is crucial for a visually balanced tile roof․ Typically, begin at the lowest course, working upwards to ensure proper overlap and water shedding․ Consider centering the tile layout to avoid narrow, awkward cuts at the roof edges, maximizing aesthetic appeal․
For asymmetrical roofs, start from the center line and work outwards on both sides simultaneously․ This ensures symmetry and minimizes visual discrepancies․ Always check local building codes for specific requirements regarding starting points and tile alignment․

Calculating Tile Coverage
Accurate tile coverage calculation prevents material shortages or excessive waste․ Begin by determining the roof’s total area in square feet or meters․ Account for roof pitch, as steeper slopes require more tiles due to overlap․ Factor in waste – typically 5-10% – for cuts, breakage, and potential errors during installation․
Consult the tile manufacturer’s specifications for exact coverage rates per tile, considering exposure and overlap recommendations․ Utilize online calculators or roofing software for precise estimations, ensuring a cost-effective and efficient project․
Tile Installation Process
Begin with the first course of tiles, ensuring proper alignment and overhang according to manufacturer guidelines․ Secure tiles using appropriate fastening methods – nails, screws, or clips – based on tile type and roof structure․ Maintain consistent spacing and alignment throughout the installation process․
Stagger tile joints for enhanced structural integrity and aesthetic appeal․ Regularly check for levelness and adjust as needed․ Prioritize safety by using appropriate fall protection and handling tiles carefully to prevent damage or injury․
Installing the First Course of Tiles
The initial tile course is critical for a successful installation, establishing alignment for subsequent rows․ Begin at the eaves, ensuring a consistent overhang as specified in the plans or manufacturer’s instructions․ Use a starter strip or continuous drip edge to prevent water penetration under the tiles․
Carefully position each tile, maintaining proper spacing and alignment․ Secure the first course firmly, as it bears the weight of subsequent layers․ Double-check for levelness and adjust as needed before proceeding to the next course․
Fastening Methods for Tiles
Tile fastening depends on the tile type and local building codes․ Common methods include nailing, screwing, and clipping․ Nailing is suitable for wood decking, using corrosion-resistant nails driven into the tile and decking․ Screwing offers greater holding power, especially for concrete or steel decking․
Clipping systems provide concealed fastening, enhancing aesthetics and reducing the risk of water intrusion․ Ensure fasteners penetrate sufficiently into the decking for a secure hold․ Follow manufacturer’s guidelines for fastener spacing and type to maintain warranty compliance and roof integrity․
Flashing Installation
Proper flashing is crucial for waterproofing vulnerable roof areas․ Chimney flashing prevents water penetration around chimneys, requiring careful integration with the tile layout․ Valley flashing directs water flow within valleys, utilizing metal pieces fitted under the tiles․
Ensure flashing extends adequately onto the roof slope and overlaps correctly․ Use compatible materials to avoid corrosion․ Detailed manufacturer instructions, like those for Gerard Roofing, are essential for correct installation․ Correct flashing prevents leaks and extends the roof’s lifespan, safeguarding the structure․
Chimney Flashing
Chimney flashing safeguards against water intrusion around the chimney structure․ Installation involves base flashing woven into the roofing underlayment and step flashing fitted against the chimney, overlapping the base․ Counter flashing, secured to the chimney itself, covers the step flashing, creating a watertight seal․
Precise fitting is vital; gaps can lead to leaks․ Refer to manufacturer guidelines, such as those found in comprehensive tile roof installation guides, for specific recommendations․ Proper chimney flashing ensures long-term protection and prevents costly water damage to the building’s interior․
Valley Flashing
Valley flashing is crucial for directing water flow where two roof slopes intersect․ It prevents leaks by creating a waterproof channel․ Typically, a continuous metal sheet is installed, extending up under the tiles on both sides of the valley․
Proper overlap and secure fastening are essential․ Tile roof installation guides emphasize the importance of using corrosion-resistant materials․ Detailed instructions, often found in manufacturer documentation, outline specific techniques for weaving flashing into the underlayment and securing it beneath the tiles, ensuring a durable and watertight valley․
Ridge and Hip Tile Installation
Ridge and hip tiles cap the roof’s peaks, providing a finished look and crucial weather protection․ Installation requires careful alignment and secure fastening, often utilizing specialized ridge and hip tile fixings․ These tiles overlap, shedding water effectively․
Tile roof installation guides detail specific methods for cutting and fitting tiles around hips and ridges․ Proper underlayment extension is vital․ Manufacturer instructions, like those for Gerard Roofing, offer step-by-step guidance, ensuring a watertight seal and aesthetically pleasing finish to the roof’s highest points․
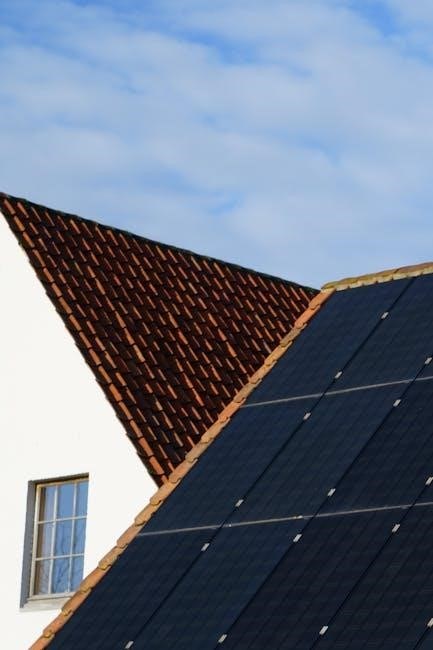
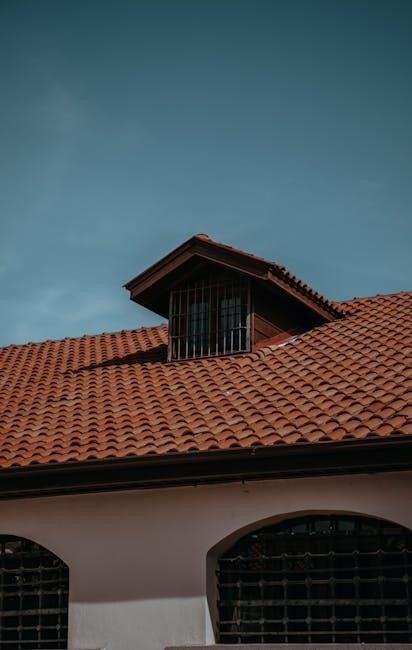
Pass-Through Installation (Vents, Skylights)
Properly installing pass-throughs for vents and skylights is critical for maintaining roof integrity․ This involves careful flashing to prevent leaks around penetrations․ Tile roof installation guides emphasize the importance of roof-specific instructions, particularly for components like VILPE XL Concrete Tile pass-through sets․
These sets are designed for exhaust ducts, roof fans, and rubber installations․ Detailed manuals, such as those provided by VILPE, outline precise steps․ Sealing around the pass-through with appropriate materials, like EUROTOP membrane, is essential for a watertight barrier․
Sealing and Waterproofing
Achieving a watertight tile roof requires meticulous sealing and waterproofing techniques․ Utilizing underlayment as a primary barrier is crucial, followed by careful flashing around all roof penetrations – chimneys, valleys, and pass-throughs․ Products like EUROTOP membrane are specifically designed as a sealing layer for tile roofs laid on various sheathing materials․
These membranes provide an extra layer of protection against water intrusion․ Gerard Roofing installation manuals highlight the importance of following their step-by-step instructions for optimal sealing, ensuring long-term roof performance and durability․
Specific Tile Manufacturer Instructions (Gerard Roofing)
Gerard Roofing provides a complete installation guide designed to assist with all aspects of their roofing systems․ Adhering to their detailed, step-by-step instructions is paramount for a successful and long-lasting installation․ This manual covers everything from initial preparation to final sealing, ensuring optimal performance․

The guide emphasizes proper techniques for fastening, flashing, and overall system integration․ Following Gerard’s recommendations guarantees the roof’s integrity and validates any associated warranties, protecting your investment and providing peace of mind․
EUROTOP Membrane Installation as a Sealing Layer
EUROTOP membrane serves as a crucial sealing layer specifically designed for tiled roofs constructed over sheathing materials like boards, plywood, and OSB․ It’s intended for use on pitched roofs with a slope greater than 20 degrees, providing essential waterproofing beneath the tiles․
This membrane acts as a preliminary underlayment, enhancing the roof’s resistance to moisture penetration․ Proper installation, as detailed in the EUROTOP installation manual, is vital for maximizing its protective benefits and ensuring a dry, secure building envelope․
VILPE XL Concrete Tile Pass-Through Sets
The VILPE XL Concrete Tile pass-through set is specifically engineered for installations within concrete tile roofing systems․ It facilitates the secure and watertight integration of XL set exhaust ducts, roof fans, and rubber components․
This set is a universal solution, suitable for various tile roof installations, ensuring proper ventilation and preventing water ingress around roof penetrations․ Refer to the roof-specific pass-through installation instructions for detailed guidance․ The VILPE Solar pass-through set is also available, expanding application possibilities․
Roof Load Transfer and Supporting Systems
Tile roofs necessitate a robust supporting structure capable of handling significant weight․ Traditionally, the roof load is transferred to a wood frame, demanding careful consideration of structural integrity․
Japanese roof-supporting systems differ, highlighting regional variations in construction techniques․ Proper load transfer is crucial for long-term roof performance and safety․ Ensure the underlying structure is adequately reinforced to accommodate the tile’s weight, including underlayment and potential snow loads․ A detailed structural assessment is highly recommended before installation․
Safety Precautions During Installation
Tile roof installation presents inherent risks requiring strict adherence to safety protocols․ Working at heights demands fall protection equipment – harnesses, lifelines, and secure scaffolding are essential․
Wear appropriate personal protective equipment (PPE), including hard hats, safety glasses, and work gloves․ Be mindful of dropped materials and establish a clear drop zone․ Exercise caution when handling heavy tiles to prevent strains or injuries․ Ensure proper training for all personnel involved in the installation process, emphasizing safe lifting techniques and hazard awareness․
Tools and Materials Checklist
A comprehensive checklist ensures a smooth tile roof installation․ Essential tools include a measuring tape, chalk line, safety glasses, work gloves, hammer, nail gun, and circular saw with a masonry blade․
Materials needed encompass underlayment, flashing (for chimneys and valleys), roofing nails, sealant, and, of course, the chosen tile roofing material – clay, concrete, or slate․ Don’t forget appropriate fasteners for the specific tile type and a EUROTOP membrane for sealing․ Verify quantities based on calculated tile coverage․
Troubleshooting Common Installation Issues
Addressing issues promptly ensures a durable tile roof․ Common problems include incorrect tile overlap, leading to leaks, and inadequate flashing around chimneys or in valleys․ Improper fastening can cause tiles to shift or dislodge, especially during weather events․

Ensure proper roof pitch to prevent water pooling․ Verify underlayment is correctly sealed and overlapped․ If using pass-throughs like VILPE XL sets, confirm a watertight fit․ Always consult manufacturer instructions (like Gerard Roofing guides) for specific solutions and best practices․
Maintenance and Inspection of Tile Roofs
Regular maintenance extends tile roof lifespan; Inspect annually for cracked, broken, or slipped tiles, especially after storms․ Check flashing around chimneys, vents, and valleys for deterioration or gaps․ Ensure proper drainage; clear any debris obstructing gutters or downspouts․
Look for signs of water damage inside the attic․ Promptly address any issues identified․ Consider professional inspection every few years․ Proper sealing, utilizing membranes like EUROTOP, contributes to long-term performance․ Following installation guides ensures preventative measures are taken․