The Honeywell TH6320WF2003 is a professional-grade, Wi-Fi enabled programmable thermostat, offering smart home integration and remote control capabilities for enhanced comfort.
Overview of the TH6320WF2003 Model
The TH6320WF2003 thermostat represents Honeywell’s T6 Pro series, designed for professional installation and offering a user-friendly experience. This model boasts full Wi-Fi connectivity, enabling remote access and control via a mobile app. It supports 7-day programmable schedules, geofencing, and integrates seamlessly with smart home ecosystems.
Compatibility is key; it works with most 24V heating and cooling systems. Detailed installation guides (PDF format) are readily available, alongside comprehensive user manuals for the TH6220WF and TH6320 series.
Key Features and Benefits
Key features of the TH6320WF2003 include Wi-Fi connectivity for remote control, customizable 7-day scheduling, and geofencing technology to optimize energy usage. Benefits encompass increased home comfort, potential energy savings, and convenient control via the Honeywell Home app.
Professional installation is recommended, aided by readily available guides. Users gain access to features like password management and device setup through the GoDaddy Email & Office Dashboard, enhancing overall system security and usability.
Pre-Installation Considerations
Before installation, verify HVAC system compatibility and gather necessary tools. Prioritize safety by disconnecting power and carefully reviewing the provided installation instructions.
Compatibility Check: HVAC System Requirements
The TH6320WF2003 thermostat is designed for compatibility with most 24V heating and cooling systems, including furnaces, air conditioners, heat pumps, and boilers. However, it’s crucial to confirm your system’s voltage and wiring configuration. It supports single-stage, multi-stage, and heat pump systems.
Specifically, ensure your system doesn’t require a common (C) wire for operation, although the thermostat can operate without one using power stealing. Check for compatibility with millivolt systems, as they are generally not supported. Refer to the detailed compatibility list in the installation guide.
Tools Required for Installation
For a smooth installation of your Honeywell TH6320WF2003 thermostat, gather these essential tools: a Phillips head screwdriver, a flathead screwdriver, wire strippers, a pencil, a level, and potentially a drill with appropriate bits for mounting.
A voltage tester is highly recommended for safety, ensuring power is off before wiring. A smartphone or tablet with Wi-Fi access will be needed for setup. Finally, have the thermostat’s installation guide readily available for reference throughout the process.
Safety Precautions
Prioritize safety during installation! Always turn off power to your HVAC system at the breaker box before beginning any wiring. Verify the power is off with a voltage tester. If you are uncomfortable working with electrical wiring, consult a qualified HVAC professional.
Wear appropriate safety glasses to protect your eyes. Carefully read and understand all instructions before starting. Improper installation can lead to system malfunction or safety hazards, so proceed with caution.
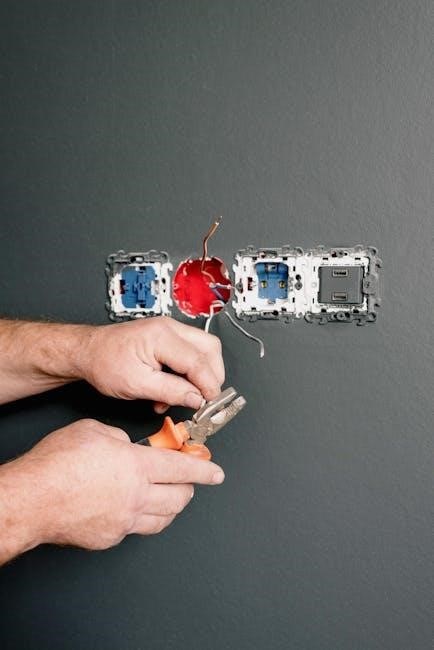
Installation Process: Wiring
Carefully identify existing wiring before disconnecting the old thermostat; label each wire for accurate reconnection to the TH6320WF2003 terminals.
Identifying Existing Wiring
Before disconnecting the old thermostat, meticulously document the existing wiring configuration. Carefully label each wire with its corresponding terminal designation – R, W, Y, G, C, Aux, and E are common. Take a clear photograph of the wiring setup as a visual reference.
If unsure about any wire, consult a qualified HVAC technician. Incorrect wiring can damage your system or the thermostat. The TH6320WF2003 requires a common (C) wire for consistent power; ensure its presence.
Connecting the Thermostat Wires (Detailed Guide)
Following your wiring labels and the TH6320WF2003’s wiring diagram, connect each wire to the corresponding terminal on the thermostat base plate. Ensure wires are securely inserted into the terminals – a gentle tug confirms a solid connection.
Double-check all connections against your documentation and the photograph taken earlier. Incorrect connections can lead to system malfunction. If a wire doesn’t fit easily, re-verify the terminal assignment.
Specific Wiring for Aux and E Terminals (TH6320WF2003 Note)
For the TH6320WF2003, a crucial note applies to the Aux and E terminals. If your existing system lacks separate wires for both, connect the wire to the Aux terminal only. Do NOT connect any wire to the E terminal in this scenario.
Incorrect wiring of these terminals can disrupt heating or cooling functionality. Always prioritize the guidance specific to this model for optimal performance and system safety.
Avoiding Common Wiring Mistakes
During installation, carefully verify each wire connection against your existing system’s wiring and the TH6320WF2003 wiring diagram. Incorrectly placed wires can cause system malfunctions or damage. Double-check that wires are securely fastened to the terminals, preventing loose connections.
Never assume wire colors are standardized; always trace wires back to their source. Avoid short circuits by ensuring no bare wires touch each other or the metal baseplate.

Installation Process: Mounting & Power
Securely mount the thermostat base plate to the wall, ensuring it’s level. Then, carefully attach the thermostat display and power on the system for setup.
Mounting the Thermostat Base Plate
Begin by turning off power to your HVAC system at the breaker. Remove your old thermostat, carefully disconnecting the wires and labeling each one. Using the included screws, mount the TH6320WF2003 base plate to the wall, ensuring it is level for accurate temperature readings.
A level base is crucial for proper operation. Utilize a small level during installation. The base plate should fit snugly against the wall, providing a stable foundation for the thermostat display.
Attaching the Thermostat Display
Once the base plate is securely mounted, carefully align the thermostat display with the base. Gently push the display onto the base plate until it clicks into place, ensuring a firm and secure connection. Verify that the display is fully seated and doesn’t wobble.
Avoid forcing the display; if it doesn’t easily attach, re-check the alignment. A proper connection is vital for the thermostat to function correctly and display information clearly.
Powering On and Initial Setup
After attaching the display, restore power to your HVAC system at the breaker. The thermostat should power on automatically, initiating the initial setup sequence. Follow the on-screen prompts to select your language, date, and time.
The thermostat will then guide you through system configuration, identifying your heating and cooling system type. Accurate setup is crucial for optimal performance and efficient operation of your Honeywell TH6320WF2003.
Connecting to Wi-Fi
Establishing a Wi-Fi connection unlocks remote control and smart features. Access the setup menu on the thermostat display to connect to your home network easily.
Accessing the Wi-Fi Setup Menu
To begin the Wi-Fi setup, navigate to the thermostat’s main menu using the touchscreen display. Select the “Network” or “Wi-Fi” option, typically represented by a corresponding icon. The thermostat will then scan for available wireless networks in your area.
A list of detected networks will appear on the screen; choose your home network from this list. You’ll be prompted to enter your Wi-Fi password using the on-screen keyboard. Ensure the password is entered correctly, as incorrect credentials will prevent connection.
Connecting to Your Home Network
After entering your Wi-Fi password, the thermostat will attempt to connect to your home network. This process may take a few moments, and a progress indicator will be displayed on the screen. A successful connection will be confirmed with a message indicating “Connected” or a similar status.
If the connection fails, double-check the password and ensure your router is functioning correctly. Restarting both the thermostat and router can often resolve connectivity issues. Refer to the troubleshooting section for further assistance.
Troubleshooting Wi-Fi Connection Issues
If your TH6320WF2003 fails to connect, verify the Wi-Fi password is correct and the router is broadcasting on a 2.4 GHz network – it doesn’t support 5 GHz. Restarting both the thermostat and your router is a common first step. Ensure the thermostat is within range of the Wi-Fi signal.
Check for interference from other devices. If problems persist, consult the Honeywell/Resideo support website for detailed troubleshooting guides and FAQs.

GoDaddy Email & Office Dashboard Integration
GoDaddy’s Email & Office Dashboard manages your email account, enabling password changes, forwarding, and device setup for a seamless business communication experience.
Managing Email Account Options
Within the GoDaddy Email & Office Dashboard, users gain comprehensive control over their email accounts. This includes the ability to modify account settings, create email aliases, and establish forwarding addresses for streamlined communication. Password management is centralized, enhancing security, and options for setting up email on various devices – phones, tablets, or desktop clients – are readily available. The dashboard serves as a central hub for all email-related configurations, ensuring a personalized and efficient email experience tailored to individual business needs.
Password Changes and Security Settings
The GoDaddy Email & Office Dashboard prioritizes account security, offering a straightforward process for password changes. Users can easily update their passwords to maintain robust protection against unauthorized access. Additional security features, such as two-factor authentication options, may also be available to further strengthen account defenses. Regularly updating passwords and utilizing available security settings are crucial steps in safeguarding sensitive email data and ensuring the confidentiality of business communications.
Setting Up Email on Devices
GoDaddy simplifies setting up your business email across various devices. After account creation within the Email & Office Dashboard, you can configure your email in preferred clients like Outlook, Apple Mail, or on mobile devices. GoDaddy provides detailed instructions and server settings (IMAP/POP3, SMTP) for seamless integration. This ensures access to your professional, domain-based email from any location, fostering efficient communication and collaboration across all your preferred platforms.
User Interface and Navigation
The TH6320WF2003 features an intuitive display, allowing easy navigation through menu options for programming schedules and adjusting settings to personalize your comfort.
Understanding the Thermostat Display
The Honeywell TH6320WF2003 boasts a clear, backlit LCD screen presenting essential information at a glance. You’ll find the current temperature, setpoint, operating mode (heat, cool, auto, off), and Wi-Fi connection status prominently displayed. Icons indicate fan operation and system status. Navigation is facilitated by intuitive buttons surrounding the screen, allowing for effortless adjustments to temperature, schedules, and settings. The display also provides alerts for system issues or maintenance reminders, ensuring optimal performance and user awareness.
Navigating the Menu Options
Accessing the menu on the TH6320WF2003 is simple – press the ‘Menu’ button. From here, you can adjust system settings, program schedules, configure Wi-Fi, and view system information. Use the up/down arrow buttons to scroll through options, and the ‘Select’ button to confirm your choices. The thermostat allows for flexible scheduling, enabling customized temperature settings for different times of day and days of the week, optimizing comfort and energy savings.
Programming Schedules and Settings
The TH6320WF2003 excels in scheduling. Within the menu, select ‘Schedule’ to create personalized heating and cooling programs. You can define different periods – Wake, Leave, Return, and Sleep – with unique temperature settings for each day. Utilize the ‘Hold’ function for temporary overrides. Fine-tune settings like swing temperature and cycle rate for optimal comfort and efficiency. Remember to save changes after each adjustment to ensure your preferences are retained.
Advanced Features
The TH6320WF2003 boasts geofencing, remote app control, and smart home compatibility, enhancing convenience and energy savings through intelligent automation features.
Geofencing Capabilities
Geofencing utilizes your smartphone’s location to automatically adjust the thermostat settings. As you approach home, the system proactively heats or cools, ensuring comfort upon arrival. Leaving triggers energy-saving setbacks. This feature, accessible through the Honeywell Home app, requires location permissions and setup within the app’s geofencing section. It optimizes energy usage based on occupancy, providing both convenience and potential cost reductions, adapting to your lifestyle seamlessly.
Remote Control via Mobile App
The Honeywell Home app enables complete thermostat control from anywhere with an internet connection. Adjust temperature settings, view current conditions, and manage schedules remotely. The app provides real-time insights into energy usage and allows for customized comfort profiles. Notifications alert you to system changes or potential issues, ensuring optimal performance and peace of mind, all conveniently managed from your smartphone or tablet.
Smart Home Integration (Compatibility)
The TH6320WF2003 seamlessly integrates with popular smart home platforms like Amazon Alexa and Google Assistant. Voice control allows hands-free temperature adjustments and convenient operation. Compatibility extends to other Resideo systems, creating a unified smart home experience. This integration enhances convenience, energy efficiency, and overall home automation, providing a connected and responsive living environment for ultimate comfort and control.

Troubleshooting Common Issues
Common problems include power failures, Wi-Fi connectivity issues, and inaccurate temperature readings; solutions involve checking wiring, network settings, and calibration.
Thermostat Not Powering On
If the thermostat fails to power on, first verify the breaker supplying power to the HVAC system is active. Then, carefully inspect the wiring connections at both the thermostat and the furnace/air handler, ensuring they are secure and correctly placed. Confirm the ‘C’ wire (common wire) is properly connected, as it’s essential for consistent power.
A missing or loose ‘C’ wire is a frequent cause. If no ‘C’ wire exists, a C-wire adapter may be necessary. Finally, check the thermostat’s batteries (if applicable) and replace them if depleted.
Wi-Fi Connectivity Problems
Experiencing Wi-Fi issues? Double-check your home network is functioning correctly and that the thermostat is within range of the router. Verify you’ve entered the correct Wi-Fi password during setup. Restarting both the thermostat and your router can often resolve connectivity glitches.
Ensure your router’s firmware is up-to-date. If problems persist, temporarily disable any firewall settings that might be blocking the thermostat’s connection. Consult Honeywell’s support resources for further assistance.
Incorrect Temperature Readings
If the thermostat displays inaccurate temperatures, first ensure it isn’t directly exposed to sunlight or drafts. Verify proper airflow around the unit isn’t obstructed. Calibrate the temperature within the thermostat’s settings menu, comparing it to a trusted thermometer.
Confirm the thermostat is correctly installed, away from heat-generating appliances. If discrepancies continue, a sensor malfunction might be present, requiring professional service or replacement.
Downloading Resources
Access essential documents like the TH6320WF2003 owner’s manual, installation guides (PDF format), and relevant FCC resources online for comprehensive support.
Accessing the Honeywell User Manual (TH6220WF01, TH6220WF2006, TH6320WF2003, etc.)
Honeywell provides a comprehensive user manual covering various models, including TH6220WF01, TH6220WF2006, and the TH6320WF2003. This valuable resource details thermostat operation, programming schedules, troubleshooting, and safety information. You can directly download the manual from Honeywell’s website or access a mirrored download link. The manual, often in PDF format, offers detailed diagrams and step-by-step instructions to maximize your thermostat’s functionality and ensure proper usage.
Finding Installation Instructions (PDF)
Detailed installation instructions in PDF format are readily available for the TH6320WF2003 thermostat. These guides provide a step-by-step walkthrough of the wiring process, mounting procedures, and initial setup. Honeywell offers these instructions directly, and mirrored copies can also be found online. The PDF includes crucial diagrams illustrating wire connections and baseplate mounting, ensuring a smooth and accurate installation process for both professionals and DIY enthusiasts.
FCC.gov Resources
The Federal Communications Commission (FCC) provides valuable resources regarding radio frequency devices like the Honeywell TH6320WF2003. FCC.gov offers information on compliance testing, certification, and potential interference issues. While not directly an installation guide, understanding FCC regulations ensures the thermostat operates within legal limits. Accessing these resources can be helpful for resolving potential signal conflicts or verifying the device’s adherence to safety standards, promoting responsible usage.
Support and Contact Information
For assistance, visit customer.resideo.com or call 1-800-468-1513. Honeywell/Resideo offers comprehensive support for the TH6320WF2003 thermostat.
Honeywell/Resideo Customer Support Website
The Resideo website (customer.resideo.com) is a central hub for TH6320WF2003 support. Here, you’ll find an extensive FAQ section addressing common installation and operational questions. Downloadable resources, including the complete user manual for models TH6220WF01, TH6220WF2006, TH6320WF2003, and others, are readily available.
Furthermore, the site provides troubleshooting guides, wiring diagrams, and access to online chat support for personalized assistance. You can also register your product for warranty information and future updates.
Phone Support Number (1-800)
For direct assistance with your TH6320WF2003 thermostat installation or operation, Honeywell/Resideo offers phone support at 1-800. This dedicated helpline connects you with knowledgeable technicians prepared to guide you through wiring issues, Wi-Fi connectivity problems, or any other challenges you may encounter.
Be prepared to have your model number and details about your HVAC system readily available to expedite the support process and ensure accurate assistance.
Post-Installation Checks
Confirm proper operation by testing both heating and cooling functions, and finalize your desired schedule settings within the thermostat’s interface for optimal comfort.
Verifying System Operation
After installation, thoroughly verify your HVAC system’s operation. Begin by setting the thermostat to “heat” mode and ensuring warm air is distributed. Then, switch to “cool” mode to confirm proper cooling functionality. Observe the system for any unusual noises or behaviors.
Check that the thermostat accurately reflects the room temperature. If discrepancies exist, consult the manual for calibration instructions. Confirm the fan operates correctly in both auto and on settings, ensuring consistent airflow throughout your home.
Testing Heating and Cooling Functions
Rigorous testing is crucial post-installation. Initiate a heating cycle and monitor if the furnace ignites and delivers warm air. Subsequently, activate the cooling cycle, verifying the air conditioner compressor engages and cool air circulates.
Observe a complete heating and cooling cycle for each function. Ensure the thermostat accurately responds to temperature changes and maintains the setpoint. Listen for any unusual sounds indicating potential issues within the HVAC system, addressing them promptly.
Finalizing Schedule Settings
Customize your comfort with personalized schedules. Utilize the thermostat’s programming features to establish temperature settings for different times of day and days of the week, optimizing energy efficiency.
Consider your daily routines and preferences. Implement setback temperatures during sleep or when the home is unoccupied. Review and adjust the schedule as needed to fine-tune performance and maximize savings, ensuring consistent comfort throughout your home.