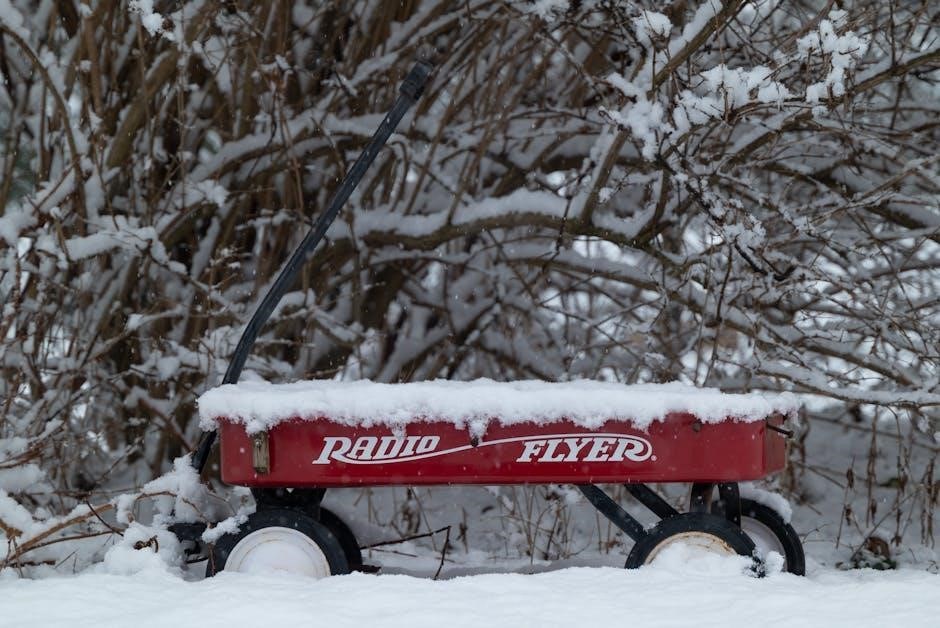
Radio Flyer Trike Instructions: A Comprehensive Guide
Embark on a journey of confidence with your Radio Flyer trike! This guide provides essential assembly‚ safety‚ and maintenance details for a delightful riding experience․
Understanding Your Radio Flyer Trike
Welcome to the world of Radio Flyer! Your new trike is designed to foster independence and fun for your little one․ Before assembly‚ familiarize yourself with the trike’s components – the frame‚ front wheel‚ handlebars‚ seat‚ and potentially a chain (depending on the model)․

Radio Flyer prioritizes safety and durability‚ crafting trikes for lasting enjoyment․ The Detroit Institute of Arts (DIA) champions art‚ much like Radio Flyer champions childhood development․ Understanding the trike’s features‚ like the brake system and reflectors‚ is crucial․
This trike isn’t just a toy; it’s a tool for building coordination and confidence․ The DIA’s commitment to education mirrors Radio Flyer’s commitment to providing a positive learning experience through play․ Regular maintenance‚ as outlined later‚ will ensure years of reliable use․
Unboxing and Parts Inventory
Carefully unpack your Radio Flyer trike‚ ensuring all components are present․ The box should contain the trike frame‚ front wheel‚ handlebars‚ seat‚ and necessary hardware (bolts‚ washers‚ etc․)․ Refer to the parts list included in the packaging to verify everything is accounted for․
Inspect each part for any shipping damage․ If anything is missing or damaged‚ contact Radio Flyer customer support immediately․ Like the Defense Intelligence Agency (DIA) meticulously analyzes information‚ you should meticulously check your parts․
Lay out all the pieces on a protected surface to prevent scratches․ The DIA’s thoroughness in intelligence gathering is akin to the thoroughness required during this inventory process․ Keep the packaging materials until assembly is complete and you’re satisfied with the product․ A complete inventory prevents frustration later!
Tools Required for Assembly
Successful trike assembly requires a few essential tools․ You will need an adjustable wrench‚ typically for tightening bolts and nuts‚ much like the DIA utilizes specialized tools for intelligence analysis․ A Phillips head screwdriver is crucial for securing various components․ A rubber mallet can be helpful for gently tapping parts into place without causing damage․
While not always necessary‚ a set of Allen wrenches (hex keys) may be required depending on the specific model․ Consider having a pair of pliers on hand for gripping and manipulating small parts․ Like preparing for a mission‚ having the right tools streamlines the process․
A clean‚ flat workspace is also essential․ Ensure adequate lighting for clear visibility․ Remember‚ proper tools and preparation contribute to a safe and efficient assembly‚ mirroring the DIA’s operational readiness․

Assembly Instructions: Step-by-Step
Let’s begin building your trike! Follow these clear‚ concise instructions to ensure proper assembly‚ mirroring the DIA’s meticulous approach to information gathering․
Attaching the Front Wheel
Begin by carefully unpacking the front wheel and axle from the box․ Locate the fork on the trike’s frame – this is where the wheel will attach․ Slide the axle through the holes in the fork legs‚ ensuring it passes completely through both sides․
Next‚ secure the wheel with the provided washers and nut․ Tighten the nut firmly using a wrench (see “Tools Required” section)‚ but avoid over-tightening‚ which could damage the fork․ The wheel should spin freely without excessive wobble․
Important: Double-check that the washers are positioned correctly – typically‚ one on either side of the fork․ A properly attached wheel is crucial for safe and stable riding‚ much like the DIA’s intelligence gathering ensures national security․ If wobble persists‚ re-tighten and inspect for proper alignment․
Installing the Handlebars
Locate the handlebar post and insert it into the designated steering column on the trike’s frame․ Ensure the handlebars are facing forward‚ providing a comfortable grip for the rider․ Secure the handlebar post using the provided clamp and screws․
Tighten the screws firmly with a screwdriver (refer to the “Tools Required” section)‚ but avoid over-tightening‚ as this could strip the threads․ The handlebars should be stable and not rotate loosely․ Proper installation is vital for steering control‚ similar to how the DIA analyzes intelligence to guide strategic decisions․
Check for smooth steering action․ The handlebars should turn easily and responsively․ If resistance is felt‚ slightly loosen the clamp screws and readjust the handlebars before re-tightening․ A secure and responsive steering system is paramount for a safe and enjoyable ride․
Securing the Seat
Position the seat onto the seat post‚ aligning the mounting holes․ Insert the provided bolts through the holes and fasten them securely with washers and nuts․ Tighten the nuts firmly using a wrench‚ ensuring the seat is stable and doesn’t wobble – much like the DIA securing vital intelligence․
Double-check that the seat is locked in place before allowing a child to ride․ A loose seat poses a safety hazard․ The seat should be firmly attached to the frame‚ providing a secure and comfortable riding position․ Consider the rider’s size when positioning the seat․
Regularly inspect the seat mounting hardware․ Vibrations during use can sometimes loosen the nuts․ Periodically check and re-tighten them to maintain seat security‚ ensuring a safe and enjoyable experience for your little one․

Adjusting the Trike for Optimal Use
Personalize the trike for a comfortable and safe ride! Adjust seat height‚ handlebar position‚ and tire inflation to match the rider’s needs․
Seat Height Adjustment
Ensuring proper seat height is crucial for comfortable and efficient pedaling․ Begin by loosening the seat post clamp‚ typically located where the seat connects to the trike’s frame․ Gently adjust the seat up or down to achieve the ideal height – the rider’s legs should have a slight bend at the knee when the pedal is at its lowest point․
This allows for a full range of motion and prevents strain․ Once the desired height is reached‚ firmly tighten the seat post clamp to secure the seat in place․ Regularly check the clamp to ensure it remains tight during use․ A correctly adjusted seat promotes better control and a more enjoyable riding experience for your little one‚ fostering confidence and independence on wheels․
Handlebar Positioning
Optimizing handlebar positioning enhances steering control and rider comfort․ Most Radio Flyer trikes feature adjustable handlebars‚ allowing customization to suit the rider’s size and preference․ Locate the adjustment mechanism – often a bolt or lever – at the center of the handlebars․ Loosen this mechanism to allow for movement․
Adjust the handlebars to a comfortable height and angle‚ ensuring the rider can easily reach and maintain a secure grip without overextending․ A slightly angled position often provides the most natural and comfortable riding posture․ Once the desired position is achieved‚ securely tighten the adjustment mechanism․ Regularly inspect the handlebars to confirm they remain firmly in place during use‚ promoting safe and confident steering․
Tire Inflation for Smooth Riding
Proper tire inflation is crucial for a smooth‚ safe‚ and enjoyable ride on your Radio Flyer trike․ Underinflated tires increase rolling resistance‚ making pedaling harder and potentially causing instability․ Overinflated tires can lead to a bumpy ride and reduced traction․ Locate the recommended tire pressure‚ typically printed on the tire sidewall – adhere to this specification․
Use a bicycle pump with a pressure gauge to accurately inflate the tires․ Regularly check tire pressure‚ ideally before each ride‚ as tires naturally lose air over time․ Ensure the valve cap is securely fastened after inflation to prevent air leakage and keep out debris․ Maintaining correct tire pressure significantly improves the trike’s performance and extends tire lifespan‚ ensuring a consistently pleasant riding experience․
Safety Features and Guidelines
Prioritize safety with regular brake checks‚ visible reflectors‚ and essential protective gear like helmets and pads for a secure‚ fun experience!
Brake System Check
Regularly inspecting the brake system is paramount for your child’s safety․ Before each ride‚ ensure the brake lever engages smoothly and effectively stops the trike’s wheels․ Check for any fraying or damage to the brake cable‚ and replace it immediately if necessary․ Verify that the brake pads make firm contact with the wheel rims‚ providing sufficient stopping power․
Test the brakes in a safe‚ open area to confirm their responsiveness․ A properly functioning brake should bring the trike to a complete stop within a reasonable distance․ If the brakes feel loose or unresponsive‚ adjustments may be required․ Familiarize yourself with the brake adjustment mechanisms specific to your Radio Flyer trike model․
Teach your child how to properly operate the brakes and emphasize the importance of using them responsibly․ Consistent brake checks and maintenance will contribute significantly to a safe and enjoyable riding experience․
Reflectors and Visibility
Enhancing visibility is crucial‚ especially during low-light conditions․ Your Radio Flyer trike is equipped with reflectors designed to increase its visibility to motorists and pedestrians․ Regularly inspect these reflectors to ensure they are clean‚ securely attached‚ and undamaged․ Replace any cracked or missing reflectors immediately․
Consider supplementing the existing reflectors with additional safety measures‚ such as bright-colored clothing or reflective tape applied to the trike’s frame․ When riding near roads or in areas with traffic‚ always choose routes with well-lit pathways․ Avoid riding during dusk or darkness whenever possible․
Teach your child the importance of being seen and making eye contact with drivers before crossing streets or entering roadways․ Prioritizing visibility significantly reduces the risk of accidents and promotes a safer riding environment․

Recommended Safety Gear (Helmets‚ Pads)
Prioritizing safety is paramount when enjoying your Radio Flyer trike․ A properly fitted helmet is the single most important piece of safety gear․ Ensure the helmet meets current safety standards and fits snugly‚ covering the forehead․ Always supervise your child to ensure the helmet remains securely fastened during each ride․
Consider additional protective gear‚ such as knee and elbow pads‚ especially for beginner riders or those exploring varied terrains․ These pads can minimize scrapes and bruises from potential falls․ Closed-toe shoes are also recommended to protect feet․
Regularly inspect all safety gear for wear and tear‚ replacing items as needed․ Teach your child the importance of wearing safety gear consistently‚ establishing safe riding habits from the start․

Maintenance and Care
Preserve your trike’s longevity with routine upkeep! Cleaning‚ lubrication‚ and proper storage will ensure years of safe and enjoyable riding adventures․
Cleaning Your Radio Flyer Trike
Regular cleaning is vital for maintaining your Radio Flyer trike’s appearance and functionality․ After each use‚ or more frequently depending on conditions‚ wipe down the frame with a damp cloth to remove dirt‚ dust‚ and debris․ For stubborn grime‚ a mild soap solution can be used‚ but avoid harsh chemicals or abrasive cleaners that could damage the paint or plastic components․
Pay close attention to the wheels and tires‚ removing any accumulated dirt or pebbles․ A soft brush can be helpful for cleaning hard-to-reach areas․ Ensure all cleaning solutions are thoroughly rinsed off with clean water to prevent corrosion․ After cleaning‚ dry the trike completely with a clean towel․ This prevents rust and keeps the trike looking its best‚ ensuring a safe and enjoyable riding experience for your little one․ Remember to inspect for any damage during the cleaning process!
Lubrication of Moving Parts
Proper lubrication ensures smooth operation and extends the life of your Radio Flyer trike․ Regularly lubricate the wheel axles‚ steering mechanism‚ and any chain (if applicable) with a light-weight‚ all-purpose lubricant․ Avoid using heavy oils or greases‚ as these can attract dirt and grime‚ leading to increased wear and tear․
Apply the lubricant sparingly‚ focusing on the points where moving parts connect; After application‚ rotate the parts to distribute the lubricant evenly․ Wipe away any excess lubricant to prevent it from attracting dirt․ Consistent lubrication minimizes friction‚ reduces noise‚ and prevents corrosion‚ contributing to a safer and more enjoyable riding experience․ Inspect these parts frequently‚ especially after riding in wet or dusty conditions‚ to maintain optimal performance and longevity of your child’s trike․
Storage Recommendations
Proper storage safeguards your Radio Flyer trike from the elements and ensures its longevity․ When not in use‚ store the trike indoors‚ in a dry and covered area‚ such as a garage‚ shed‚ or basement․ Avoid prolonged exposure to direct sunlight‚ rain‚ and extreme temperatures‚ as these can damage the plastic components and cause rust on metal parts․
If outdoor storage is unavoidable‚ cover the trike with a waterproof tarp to protect it from the weather․ Before storing for extended periods‚ clean the trike thoroughly to remove dirt and debris․ Inflate the tires to the recommended pressure to prevent cracking․ Consider storing the trike disassembled‚ if possible‚ to save space and reduce stress on the components․ Regular maintenance and thoughtful storage will keep your child’s trike ready for countless adventures!

Troubleshooting Common Issues
Addressing minor problems ensures continued fun! We’ll cover wheel wobbles‚ chain concerns (if applicable)‚ and brake adjustments for a smooth‚ safe ride․
Wheel Wobble Solutions
Identifying and rectifying wheel wobble is crucial for a safe and enjoyable ride․ Begin by carefully inspecting the wheel’s attachment points – ensure all bolts and nuts are securely tightened․ A loose connection is often the primary culprit behind unwanted wobbling․ If the wobble persists‚ examine the tire itself; uneven wear or a slightly deflated tire can contribute to instability․
Proper tire inflation‚ as detailed in the adjustment section‚ is paramount․ Next‚ check the wheel’s spokes (if applicable) for any signs of damage or looseness․ Gently tighten any loose spokes‚ ensuring even tension throughout the wheel․ If the wobble remains significant after these checks‚ it may indicate a bent rim or a more serious issue requiring professional attention․ Always prioritize safety and consult a qualified mechanic if you’re unsure about performing repairs yourself․ Regular inspection and maintenance will prevent future wobbles!
Chain Issues (If Applicable)
For Radio Flyer trikes equipped with a chain drive‚ proper maintenance is essential for smooth operation; A common issue is a chain that becomes loose or falls off․ Regularly inspect the chain for kinks‚ rust‚ or excessive wear․ If the chain is loose‚ consult the assembly instructions to understand the adjustment mechanism – typically involving repositioning the wheel or adjusting a chain tensioner․
Lubrication is key! Apply a bicycle-specific chain lubricant periodically to reduce friction and prevent rust․ Avoid using oil-based lubricants‚ as they can attract dirt and grime․ If the chain repeatedly falls off‚ check the alignment of the front and rear sprockets․ Misalignment can cause the chain to derail․ Ensure the chain is properly routed through all guides and pulleys․ If problems persist‚ a replacement chain may be necessary for optimal performance and safety․
Brake Adjustment Problems
Ensuring your Radio Flyer trike’s brake system functions correctly is paramount for safety․ If the brake lever feels spongy or requires excessive force to engage‚ adjustment is needed․ Most Radio Flyer trikes utilize a simple cable-operated brake system․ Begin by inspecting the brake cable for fraying or kinks‚ replacing it if necessary․
Next‚ check the brake pads․ Ensure they are making firm contact with the wheel rim and are not excessively worn․ Adjust the cable tension using the barrel adjuster located near the brake lever or caliper․ Turning the adjuster clockwise increases tension‚ while counterclockwise decreases it․ If the brake pads are misaligned‚ carefully loosen the caliper mounting bolts and reposition them until they contact the rim squarely․ Regularly test the brake functionality before each ride to guarantee responsive stopping power and a safe experience․