Flute Finger Chart PDF: A Comprehensive Guide
Flute finger chart PDFs are invaluable resources for players of all levels, offering a visual guide to mastering notes. Several sources, like Yamaha and Jennifer Cluff, provide
downloadable charts for convenient access. These charts simplify learning and improve playing accuracy, making practice more efficient and enjoyable for musicians.
What is a Flute Finger Chart?
A flute finger chart is a diagrammatic representation illustrating which keys to press on a flute to produce specific notes. These charts, often available as PDF documents, visually map the finger combinations required for each pitch across the flute’s range. They serve as essential learning tools for beginners, providing a quick reference for correct finger placement.
More experienced players also utilize these charts, particularly when exploring alternate fingerings or tackling complex passages. Resources like Yamaha and Jennifer Cluff offer comprehensive charts. The “Flute For Dummies” chart focuses on basic fingerings, making it ideal for those starting their musical journey. Essentially, a flute finger chart demystifies the instrument, translating musical notation into physical actions.
Why Use a PDF Flute Finger Chart?
Utilizing a PDF flute finger chart offers numerous advantages for musicians. The portability of a PDF allows access to the chart anywhere – during lessons, rehearsals, or practice sessions. Digital formats, sourced from sites like Yamaha and Jennifer Cluff, are easily downloadable and printable.
PDF charts provide a clear, visual aid, reducing reliance on memorization, especially for beginners. They’re invaluable for learning alternate fingerings, expanding technical capabilities. The “Flute For Dummies” chart simplifies the basics. Furthermore, a printed chart can be laminated for durability, protecting it from wear and tear. Having a readily available reference boosts confidence and accelerates learning, ultimately enhancing musical performance.
Understanding Basic Flute Fingerings
Flute fingerings represent the combinations of keys pressed to produce specific notes. A PDF flute finger chart, like those from Yamaha or the “Flute For Dummies” guide, visually maps these combinations. Typically, charts illustrate finger positions for notes across different octaves.
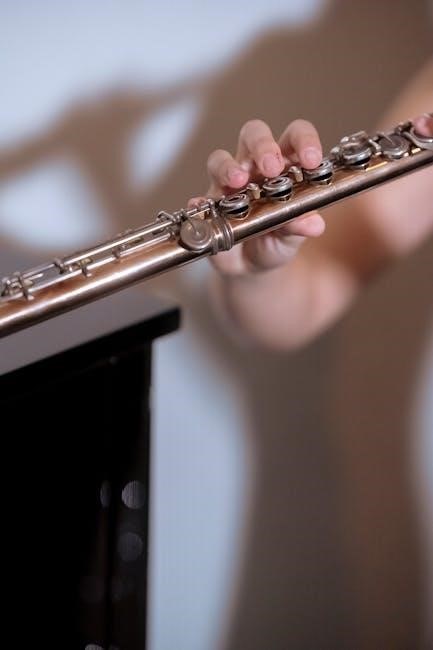
Beginners start with simple fingerings, gradually adding complexity. Understanding the chart’s layout – often organized by note or octave – is crucial. The chart shows which keys are closed (covered by fingers) and open. Mastering these basics builds a foundation for more advanced techniques and alternate fingerings. Consistent practice with a PDF chart reinforces muscle memory and improves accuracy, leading to cleaner, more confident playing.
The Standard Flute Finger Chart Layout
Most flute finger chart PDFs, including those by Yamaha and Jennifer Cluff, follow a consistent layout for clarity. Charts generally present notes linearly, often starting with low C and ascending chromatically or diatonically. Fingerings are displayed visually, showing which keys to cover with each finger.
Octaves are typically separated into distinct sections, allowing players to quickly locate fingerings for different ranges. Some charts include symbols indicating alternate fingerings. The keyhole side of the flute is usually oriented to the left, mirroring the player’s perspective. A well-designed PDF chart prioritizes readability, using clear diagrams and labeling for efficient learning and reference during practice sessions.
Key Fingerings for Common Notes
Flute finger chart PDFs prominently feature essential notes like C, D, and E, providing quick visual references for beginners to build a solid foundation.
Fingering for Middle C
Flute finger chart PDFs consistently illustrate the fingering for Middle C as a fundamental starting point for flute players. This note, crucial for building technique, is typically achieved by covering the first three keys of the flute – the index, middle, and ring fingers of the left hand.
Many charts, including those from Yamaha and “Flute For Dummies”, clearly depict this configuration. Beginners often rely on these visual aids to correctly position their fingers. Mastering Middle C is essential before progressing to more complex fingerings. The simplicity of this fingering makes it an ideal focus for initial practice sessions, fostering good habits and a clear tone. Consistent reference to a flute finger chart PDF ensures accuracy and reinforces muscle memory.
Fingering for D
Flute finger chart PDFs universally demonstrate the fingering for D as a slight variation from Middle C. To produce a D, flute players add the pinky finger of the left hand to the configuration used for C – covering the first four keys with the index, middle, ring, and pinky fingers of the left hand.
Charts from sources like Jennifer Cluff and Yamaha clearly illustrate this addition. This fingering introduces a new level of coordination, requiring players to extend their pinky while maintaining stability. Practicing the transition between C and D is a common exercise for developing finger dexterity. A flute finger chart PDF serves as a constant visual reminder, aiding in accurate and efficient fingering, and building a solid foundation for more advanced techniques.
Fingering for E
Flute finger chart PDFs consistently depict the fingering for E as building upon the D fingering. Players add the index finger of the right hand to cover the first key. This means the left hand maintains its position from the D fingering – all four fingers down – while the right hand’s index finger joins the action.
Yamaha’s and Jennifer Cluff’s charts visually emphasize this addition. Mastering this fingering requires coordinating both hands, a crucial skill for flute playing. The E fingering often presents a slight challenge for beginners, as it demands precise finger placement and a relaxed hand position. Utilizing a flute finger chart PDF during practice reinforces correct technique and promotes muscle memory, leading to cleaner and more confident performances.
Fingering for F#
Flute finger chart PDFs illustrate that achieving F# typically involves a combination of standard and potentially alternate fingerings. The most common fingering, as shown in resources like Yamaha’s chart, requires covering all keys with both hands, plus a slight embouchure adjustment. This embouchure change is crucial for directing the airflow correctly.
Some flute finger chart PDFs, including those offering alternate fingerings, may suggest variations for improved tone or ease of execution. These alternatives often involve adding or removing a finger to refine the pitch. Mastering F# demands careful attention to both fingering and breath control. Consistent practice with a flute finger chart PDF will help build the necessary coordination and precision for a clear and resonant F#.

Advanced Fingerings & Techniques
Flute finger chart PDFs often extend beyond basics, showcasing alternate fingerings for nuanced expression, complex trills, and specialized techniques like flutter tonguing for advanced players.
Alternate Fingerings: Why and When to Use Them
Flute finger chart PDFs frequently include alternate fingerings, which aren’t errors but valuable tools for skilled flutists. These variations offer solutions for smoother transitions between notes, particularly across registers, and can improve intonation in challenging passages.
Yamaha’s chart, for example, demonstrates numerous alternate options. They’re crucial when a standard fingering creates awkward hand movements or produces an unstable tone. Using them allows for more fluid phrasing and can enhance the musicality of a performance.
However, mastering alternate fingerings requires dedicated practice. They aren’t meant to replace fundamental fingerings but to supplement them, providing flexibility and control. A solid understanding of basic technique is essential before incorporating these advanced options into your repertoire.

Trill Fingerings
Flute finger chart PDFs often dedicate sections to trill fingerings, essential for executing rapid alternations between two notes. These aren’t simply fast repetitions of standard fingerings; they utilize specific hand positions to maximize speed and minimize effort. Yamaha’s comprehensive chart showcases several trill fingering options.
Effective trills rely on minimizing movement. Trill fingerings often involve keeping one finger constant while rapidly adding and removing another. This technique reduces strain and allows for cleaner, more consistent trills.
Mastering these fingerings requires slow, deliberate practice, focusing on evenness and clarity. The goal is to develop muscle memory, enabling seamless transitions between the two notes. Consistent practice, guided by a detailed PDF chart, is key to achieving proficient trilling.

Flutter Tonguing Fingerings
Flute finger chart PDFs rarely explicitly detail fingerings for flutter tonguing, as the technique primarily involves the tongue. However, charts are crucial for establishing a stable embouchure and correct hand position – the foundation for successful flutter tonguing. Yamaha’s chart aids in achieving this base.
Flutter tonguing creates a rapid “rolling” sound by quickly repeating “too” or “du” with the tongue against the roof of the mouth. While any fingering can be used, a relaxed and consistent hand position, as shown in standard charts, is vital.
Experimentation is key. Some players find certain fingerings facilitate flutter tonguing more easily. A solid understanding of basic fingerings, gleaned from a PDF chart, allows for focused experimentation with this advanced technique.

Resources for Flute Finger Charts (PDF)
Numerous PDF flute finger charts are freely available online! Yamaha, Jennifer Cluff, and even “Flute For Dummies” offer downloadable resources for players of all skill levels.
Yamaha Flute Fingering Chart PDF
Yamaha’s flute fingering chart PDF is a widely recognized and highly respected resource for flutists. Accessible directly from the Yamaha website, this chart provides a clear and concise visual representation of fingerings for a comprehensive range of notes.
It’s particularly valuable due to its inclusion of alternate fingerings, offering players options to navigate challenging passages or achieve specific tonal qualities. The chart isn’t just for beginners; experienced players also utilize it to explore different fingering possibilities.
The PDF format allows for easy downloading, printing, and portability, making it a convenient tool for practice sessions and performances. Yamaha’s commitment to musical education is evident in the quality and accessibility of this resource, solidifying its place as a staple for flute players globally.
Jennifer Cluff Flute Fingering Chart PDF
Jennifer Cluff’s flute fingering chart PDF is a popular and readily available resource for flutists seeking a comprehensive visual guide. Hosted on her website, this chart is known for its clear layout and detailed presentation of fingerings across the flute’s range.
Unlike some charts, Cluff’s version often includes helpful annotations and suggestions for optimizing technique. It’s a valuable tool for both students and teachers, facilitating effective instruction and independent learning. The PDF format ensures easy access and portability, allowing flutists to have a quick reference guide wherever they practice.
Published in 2007, it remains a relevant and trusted resource, demonstrating its enduring value within the flute community. It’s a practical aid for mastering fingerings and improving overall flute playing proficiency.
“Flute For Dummies” Basic Fingering Chart PDF
The “Flute For Dummies” basic fingering chart PDF, created by Karen Evans Moratz, offers a simplified introduction to flute fingerings, ideal for beginners. Available through the National Flute Association website, this chart is designed as a cheat sheet for those starting their musical journey.
It provides clear illustrations of the fundamental finger positions needed to produce various notes on the flute. The chart emphasizes practicality, encouraging players to print it out for convenient reference during practice and performance. Copyrighted in 2016, it remains a useful companion to the broader “Flute For Dummies” resource.
This PDF is a straightforward and accessible tool, helping new flutists quickly grasp the basics of fingering and build a solid foundation for further development.

Printing and Using Your PDF Chart
PDF flute finger charts are best utilized when printed for easy reference during practice. Consider laminating for durability, ensuring your chart withstands frequent use and remains pristine.
Optimal Print Settings for Clarity
Achieving a clear print of your flute finger chart PDF is crucial for effective practice. When printing, select “Actual Size” or “100% scale” in your printer settings to avoid distortion of the fingering diagrams.
Opt for a high-quality paper stock, such as 24lb or 28lb weight, to minimize ink bleed and ensure sharp lines. A laser printer generally produces crisper images than an inkjet, but either can work well with appropriate settings.

Experiment with grayscale printing if color isn’t essential; it can save ink and still provide sufficient contrast. Before printing the entire chart, perform a test print of a single page to verify the clarity and scale. Adjust settings as needed to guarantee readability and accurate visual representation of the fingerings.
Laminating Your Finger Chart for Durability
Protecting your printed flute finger chart PDF from wear and tear is easily achieved through lamination. This process significantly extends the chart’s lifespan, safeguarding it against spills, rips, and fading from frequent handling during practice sessions.
Choose a laminating pouch size that closely matches your printed chart. Self-adhesive laminating sheets offer a convenient, no-heat option, while a laminator machine provides a more professional and durable finish.
After lamination, consider adding a small adhesive loop or clip to the chart for easy attachment to your music stand or practice area. A laminated chart remains clean, legible, and readily available, enhancing your learning experience and ensuring long-term usability.
Integrating the Chart into Practice Sessions
Effectively using your flute finger chart PDF during practice maximizes its benefits. Don’t simply glance at it; actively refer to it while learning new notes or challenging passages. Begin by identifying the fingering for each note within your music, then visually confirm your hand position before playing.
Use the chart to explore alternate fingerings, expanding your technical capabilities and musical expression. Regularly check your fingerings against the chart to reinforce correct technique and prevent ingrained errors.
Gradually reduce your reliance on the chart as you gain proficiency, aiming for automatic recall of fingerings. However, keep it readily accessible for quick reference during complex pieces or when encountering unfamiliar notes.

Beyond the Chart: Developing Finger Dexterity
While flute finger chart PDFs aid learning, true mastery requires dedicated exercises. Scales, arpeggios, and focused drills build speed and coordination, enhancing overall flute technique.
Exercises for Improving Finger Speed
Beyond simply referencing a flute finger chart PDF, actively building finger dexterity is crucial. Begin with chromatic scales, slowly increasing tempo while maintaining clean articulation. Practice ascending and descending patterns, focusing on smooth transitions between notes.
Repetitive finger patterns, even without blowing, can strengthen muscle memory. Utilize a metronome to ensure consistent rhythm and gradually push your speed limits. Incorporate exercises that isolate individual finger movements, addressing any weaknesses.
Consider “finger tap” exercises – silently pressing the keys in rhythmic sequences. This builds coordination and endurance. Remember, consistent, focused practice, supplementing your flute finger chart PDF, is the key to unlocking faster, more agile fingerwork.
Scales and Arpeggios for Finger Coordination
Utilizing a flute finger chart PDF is a starting point, but mastering scales and arpeggios truly develops finger coordination. Begin with C major, focusing on accurate fingerings and a consistent tone. Gradually introduce other keys, expanding your range and dexterity.
Arpeggios challenge finger independence and smooth transitions. Practice both major and minor arpeggios, paying attention to evenness and clarity. Vary the rhythms – dotted, triplets – to further enhance coordination.
Regularly incorporate scale and arpeggio practice into your routine, referencing your flute finger chart PDF as needed. This builds a strong foundation for more complex pieces and improves overall technique, leading to confident and fluid playing.