Saris Bicycle Rack Instructions: A Comprehensive Guide
Navigating bike transport requires reliable equipment; this guide details Saris rack installation, usage, and maintenance, ensuring secure journeys for your prized bicycles.
Understanding Saris Bike Racks
Saris Cycling Group has established itself as a premier manufacturer of bicycle racks and accessories, renowned for innovative designs and a commitment to secure bike transport. Their racks cater to diverse needs, from casual cyclists to dedicated enthusiasts, offering solutions for hitch, trunk, and roof mounting.
Choosing the right Saris rack involves considering your vehicle type, the number of bikes you intend to carry, and your preferred loading method. Saris prioritizes ease of use alongside robust security features, like anti-wobble devices and reliable strap systems. Understanding these core principles is crucial before diving into installation. The Edge, a premium hitch rack, exemplifies their dedication to quality and thoughtful engineering, while classic trunk mounts offer affordability and convenience.
Types of Saris Bike Racks Available
Saris offers a comprehensive range of bike racks to suit various vehicles and cycling needs. Hitch mount racks, like the Saris Edge, provide exceptional stability and easy bike loading, attaching directly to your vehicle’s hitch receiver. Trunk mount racks represent a classic, budget-friendly option, securing to the trunk lid with straps – ideal for occasional use and road bikes.
Roof mount racks offer a versatile solution, freeing up hitch or trunk space, though requiring lifting bikes onto the roof. Saris racks differ in capacity, accommodating one to four bicycles. Each type features unique mechanisms for securing bikes, from wheel straps to frame clamps. Selecting the appropriate rack depends on your vehicle, bike type, and transport frequency.
Hitch Mount Racks: The Saris Edge
The Saris Edge is a premium hitch rack designed for secure and convenient bike transport. Boasting a high weight limit and unique design, it stands out in the market. Installation involves sliding the rack onto the hitch receiver and securing it with a locking pin. A key feature is the anti-wobble device, minimizing movement during travel and enhancing stability.
The Edge accommodates various bike sizes through adjustable wheel cradles and frame holders. Its tilting mechanism allows trunk access without removing bikes. Constructed with durable materials, the Saris Edge offers long-lasting reliability. It’s a significant investment, but its thoughtful design and robust build quality justify the cost for frequent cyclists.
Trunk Mount Racks: Classic Saris Options
Saris offers classic trunk mount racks, renowned for their simplicity and affordability. These racks utilize straps to secure to the vehicle, making them a versatile option for various car models. Proper placement is crucial, ensuring the rack sits flush against the trunk and doesn’t obstruct lights or the license plate.
Securing the straps – both upper and lower – is paramount for stability. Adjust the arms to comfortably fit your bike’s frame, avoiding pressure on delicate components. While these racks fold small for storage, they may require readjustment each use. They are ideal for road bikes and occasional transport, offering a cost-effective solution for cyclists.
Roof Mount Racks: Saris Solutions
Saris roof mount racks present a streamlined solution for bike transport, minimizing obstruction of the vehicle’s rear visibility and access. These systems typically require crossbars already installed on your vehicle’s roof. Installation involves securely attaching the rack base to the crossbars, ensuring a tight and stable fit before loading any bicycles.
Consider your vehicle’s height when using a roof rack, as it increases overall clearance. Proper bike placement is vital, distributing weight evenly and securing wheels and frames with dedicated straps. While offering a secure transport method, lifting bikes onto the roof requires strength and caution. Saris roof racks are a great option for those prioritizing space and aerodynamics.
Preparing for Installation
Before mounting your Saris rack, gather necessary tools, verify vehicle compatibility, and carefully unpack all components to ensure a smooth setup process.
Tools Required for Saris Rack Installation
Successful Saris rack installation hinges on having the right tools readily available. While some racks require minimal intervention, others demand a bit more preparation. Generally, a standard wrench set is crucial for tightening bolts and securing the rack to your vehicle’s hitch receiver or frame. A rubber mallet can be incredibly useful for gently adjusting components and ensuring a snug fit, particularly with trunk-mounted options.
For hitch-mounted racks like the Saris Edge, a torque wrench is highly recommended to achieve the manufacturer’s specified tightness, preventing wobbling during transport. A level can help ensure the rack is perfectly aligned. Depending on your vehicle and rack model, you might also need screwdrivers (Phillips and flathead), and potentially even protective gloves to avoid scratches. Finally, having a measuring tape handy can assist in confirming proper spacing and fit, especially when adjusting arms for different bike sizes.
Vehicle Compatibility Check
Before embarking on Saris rack installation, verifying vehicle compatibility is paramount. Not all racks fit all vehicles, and attempting installation on an incompatible setup can lead to damage or, more critically, safety hazards. Saris provides compatibility guides on their website, allowing you to input your vehicle’s make, model, and year to determine suitable rack options.
Pay close attention to hitch receiver size (for hitch racks) and trunk lid/spoiler configurations (for trunk racks). Ensure sufficient clearance exists between the rack and any rear-mounted sensors or cameras. Consider the vehicle’s weight capacity; exceeding it compromises handling and stability. Thoroughly review Saris’s recommendations and, if unsure, consult with a professional installer to guarantee a secure and reliable fit, protecting both your vehicle and your bicycles.
Unboxing and Inventory of Saris Rack Components
Upon receiving your Saris bike rack, carefully unpack the contents and conduct a thorough inventory. Compare the included components against the parts list detailed in the instruction manual. This crucial step ensures all necessary hardware – straps, bolts, anti-wobble devices, and rack arms – are present before proceeding with installation.
Inspect each part for any shipping damage, such as scratches, dents, or broken pieces. Document any discrepancies immediately and contact Saris customer support for replacements. Familiarize yourself with the function of each component; understanding their purpose streamlines the installation process. Retain the packaging and manual for future reference or potential warranty claims. A complete inventory prevents frustrating delays mid-installation.

Installation Instructions: Hitch Mount Racks (Saris Edge)
The Saris Edge simplifies hitch mounting; securely attach to your receiver, tighten the anti-wobble device, and adjust settings for optimal bike fit and transport.
Attaching the Saris Edge to the Hitch Receiver
Begin by carefully sliding the Saris Edge shank into your vehicle’s hitch receiver. Ensure the shank is fully inserted and aligned with the receiver opening. Next, secure the rack using the hitch pin included with the Saris Edge – this pin should pass through both the rack shank and the receiver tube.
Tighten the hitch pin firmly, but avoid over-tightening, which could damage the receiver or the rack. Many Saris Edge models feature an anti-rattle mechanism; engage this by tightening the corresponding adjustment knob or bolt. This minimizes movement and noise during transit. Double-check that all connections are secure before proceeding to the next step. A properly secured connection is paramount for safe bike transport.
Securing the Anti-Wobble Device
The Saris Edge incorporates an anti-wobble device to enhance stability during travel. Locate the adjustment knob or bolt specifically designed for this feature – it’s typically found near the hitch receiver connection point. Tighten this device gradually, observing how it reduces any play or movement within the hitch receiver.
Avoid excessive force when tightening; the goal is to eliminate wobble, not to overtighten and potentially damage the mechanism. A snug fit is ideal. Regularly check the anti-wobble device throughout your trip, especially after encountering bumpy roads, to ensure it remains properly adjusted. This simple step significantly improves the safety and comfort of your journey, minimizing rack movement and noise.
Adjusting the Rack for Different Bike Sizes
Saris racks, particularly the Edge, are designed to accommodate a variety of bicycle frame sizes and wheelbases. Locate the adjustable wheel cradles and frame holders – these are key to a secure fit. Loosen the clamps and reposition them to comfortably support your bike’s frame and wheels.
Ensure the frame is firmly held without pinching any cables or damaging the paint. For longer wheelbases, you may need to extend the wheel cradles further apart. Regularly check that all adjustments are secure before and during your trip. Proper adjustment prevents bike movement and potential damage during transport, offering peace of mind on the road.
Installation Instructions: Trunk Mount Racks
Securely attaching a trunk rack involves precise strap placement and adjustment; follow these steps to ensure a stable and damage-free connection to your vehicle.
Proper Placement of the Trunk Rack on the Vehicle
Achieving a secure fit begins with careful rack positioning. Center the Saris trunk rack on your vehicle’s trunk, ensuring even distribution of weight and contact. Avoid areas with excessive curvature or plastic trim, as these can compromise stability.
The rack’s legs should firmly rest against the metal body panels of the trunk or hatch. Before tightening any straps, visually inspect the rack to confirm it’s level and aligned with the vehicle’s centerline.
Pay close attention to the spacing between the rack and any lights or license plates – ensure full visibility is maintained. Refer to your vehicle’s owner’s manual for any specific recommendations or warnings regarding trunk-mounted accessories. Incorrect placement can lead to damage to your vehicle’s finish or the rack itself.
Securing the Straps: Upper and Lower
Robust strap tension is paramount for a safe journey. Begin with the lower straps, threading them through the designated vehicle attachment points and tightening incrementally. Ensure equal tension on both sides to maintain stability. Next, focus on the upper straps, repeating the process – gradual tightening is key to avoid damaging the vehicle’s paintwork.
Periodically check strap tension during initial use, as they may stretch slightly. Avoid over-tightening, which can cause stress to the rack or vehicle.
The straps should be snug enough to prevent any rack movement, but not so tight that they deform the vehicle’s body. Regularly inspect the straps for wear and tear, replacing them if necessary to maintain optimal security.
Adjusting the Rack Arms for Bike Fit
Proper bike fit is crucial for secure transport. Saris trunk racks feature adjustable arms to accommodate various bike frame styles and sizes. Loosen the arm adjustment knobs before positioning the arm near the bike’s frame. Carefully maneuver the arm to cradle the frame securely, avoiding pressure on cables or delicate components.
Retighten the knobs firmly, ensuring the bike is held snugly but not constricted.
For bikes with unusual frame shapes, experiment with arm positioning to find the most stable configuration. Regularly check the arm adjustments during travel, especially on longer journeys, to prevent shifting and potential damage. A well-fitted rack arm minimizes movement and maximizes safety.

Loading Your Bicycle onto the Saris Rack
Securely mounting your bike is paramount. Proper positioning, frame attachment, and wheel retention are key to a safe and damage-free transport experience.
Proper Bike Positioning on the Rack
Achieving optimal bike placement is crucial for stability and preventing damage during transit. Begin by considering the rack’s weight capacity and distributing the load evenly. For hitch and trunk racks, generally position the bike with the drive train facing inwards, away from potential road debris and passing vehicles.
Ensure the bike frame isn’t directly contacting any part of the vehicle’s finish to avoid scratches. When using a rack designed for multiple bikes, stagger the bikes to prevent handlebar or pedal interference. Pay attention to the rack’s specific instructions regarding wheel placement within the designated trays or cradles.
For roof-mounted racks, center the bike’s weight and ensure it’s securely fastened. Always double-check that no part of the bike extends beyond the rack’s boundaries, adhering to legal width restrictions.
Securing the Bike Frame to the Rack
Robust frame security is paramount for a safe journey. Saris racks employ various methods, including adjustable straps, clamps, or cradles, to firmly hold the bike. When using straps, ensure they wrap around a sturdy portion of the frame – avoiding cables, brake lines, or delicate components. Tighten the straps sufficiently to eliminate any movement, but avoid over-tightening, which could damage the frame.
For clamp-style racks, verify the clamp engages securely with the bike’s down tube or seat tube, following the manufacturer’s torque specifications. Cradles should conform to the frame’s shape, providing stable support. Regularly inspect these securing mechanisms before and during your trip.
Always confirm the bike is locked to the rack for added security, especially during stops.
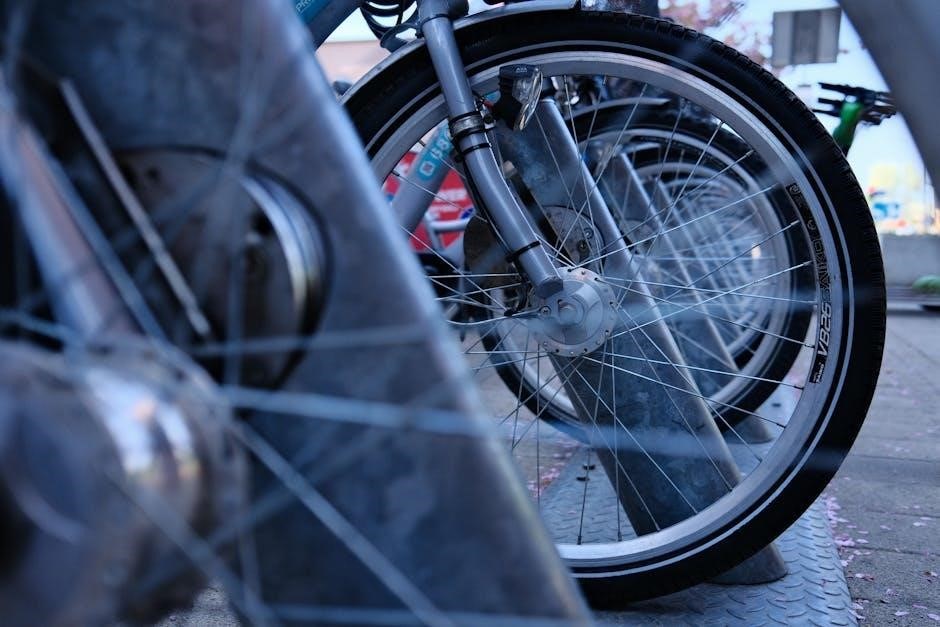
Wheel Straps and Tire Retention Systems
Effective wheel security prevents shifting during transit. Saris racks utilize wheel straps or tire retention systems to maintain bike stability. Ensure straps are positioned correctly, encompassing the tire and rim – avoiding the brake rotors or delicate sidewalls. Tighten straps firmly, but not excessively, to prevent damage or deformation of the tire.
Some Saris models feature innovative tire cradles or ratchet systems for enhanced retention. These systems often provide a more secure and user-friendly experience. Regularly inspect the straps for wear and tear, replacing them if necessary; Confirm that both front and rear wheels are adequately secured before commencing your journey.
Properly secured wheels minimize movement and potential damage.

Maintenance and Care
Prolong rack life with routine checks. Inspect components regularly, clean with mild soap and water, lubricate moving parts, and store properly when not in use.
Regular Inspection of Rack Components
Consistent inspection is crucial for safe bike transport. Before each use, meticulously examine the hitch receiver connection (if applicable) for any signs of wear, rust, or loosening. Check all bolts and fasteners, ensuring they are tightened to the manufacturer’s specifications – don’t overtighten! Inspect straps for fraying, tears, or reduced elasticity.
Pay close attention to the anti-wobble device, verifying its secure engagement. Examine the rack arms and cradles for cracks or damage. Tire retention systems, including straps and hooks, should be thoroughly checked for integrity. A quick visual assessment can prevent potential issues during travel, safeguarding both your bikes and other vehicles on the road. Prioritize safety through diligent pre-trip checks.
Cleaning and Lubrication
Maintaining your Saris rack extends its lifespan and ensures smooth operation. After each use, or seasonally, clean the rack with mild soap and water to remove dirt, grime, and road salt. Avoid harsh chemicals or abrasive cleaners that could damage the finish. Rinse thoroughly and allow to dry completely before storage.
Periodically lubricate moving parts, such as hinge points and strap buckles, with a silicone-based lubricant. This prevents corrosion and ensures effortless adjustments. Inspect and lubricate the hitch receiver mechanism (if applicable) to maintain a secure connection. Regular cleaning and lubrication contribute to the rack’s longevity and reliable performance, protecting your investment.
Long-Term Storage of the Saris Rack
Proper storage safeguards your Saris rack during extended periods of non-use. Before storing, thoroughly clean and dry the rack to prevent rust and corrosion. Store it in a cool, dry place, shielded from direct sunlight and extreme temperatures. A garage, shed, or basement are ideal locations.
If possible, store the rack indoors to protect it from the elements. Loosen straps to relieve tension and prevent cracking. Consider covering the rack with a breathable cloth to protect the finish. Regularly inspect the stored rack for any signs of damage or deterioration, ensuring it’s ready for its next adventure.

Troubleshooting Common Issues
Addressing rack wobbles, securing bikes, and strap adjustments are crucial for safe transport; this section offers solutions to common Saris rack problems.
Rack Wobbling During Transport
Excessive rack movement during travel is a common concern, often stemming from improper hitch receiver fit or insufficient tightening of the anti-wobble device. First, re-examine the connection point between the Saris rack’s shank and the hitch receiver itself – ensure it’s fully inserted and the locking pin is securely fastened.
Next, meticulously check the anti-wobble screw or bolt (specific to models like the Saris Edge). Tighten this component firmly, but avoid over-tightening, which could cause damage. If wobbling persists, inspect the hitch receiver on your vehicle for wear or looseness; a worn receiver may require professional repair or replacement.
Finally, confirm the weight distribution of the bikes on the rack is balanced. Uneven loading can exacerbate wobbling. Consider redistributing the bikes or adding additional stabilization measures if necessary.
Difficulty Securing the Bike
Encountering trouble securing your bicycle to the Saris rack often relates to bike frame compatibility or improper strap/retention system usage. Begin by verifying your bike frame’s shape and size aligns with the rack’s intended design – some racks are better suited for specific frame geometries.
Ensure the frame contact points are padded to prevent damage, and that straps are routed correctly, avoiding brake lines and cables. If using wheel straps, confirm they are tightened sufficiently to hold the tires firmly, but not so tightly as to cause damage.
For hitch racks, double-check the bike’s frame is securely clamped to the rack’s cradle. If issues persist, consult the Saris documentation for specific bike fit recommendations or consider using frame adapters if needed.
Strap Adjustment Problems
Strap adjustment difficulties with Saris racks frequently stem from incorrect routing, insufficient tension, or worn strap components. Begin by ensuring straps aren’t twisted and are threaded through the buckles correctly, following the rack’s diagram.
Achieving proper tension is crucial; straps should be snug enough to secure the bike without overstressing the frame or vehicle paint. If straps are slipping, inspect the buckle mechanism for damage or debris.
For trunk racks, ensure the upper and lower straps are balanced in tension. If straps are excessively stretched or frayed, replacement is recommended. Regularly check strap condition and adjust as needed for optimal security and to prevent damage during transport.