Party tents offer versatile shelter for events, easily set up with available instructions from sources like Quictent. They provide a convenient solution for outdoor gatherings.
What is a Party Tent?
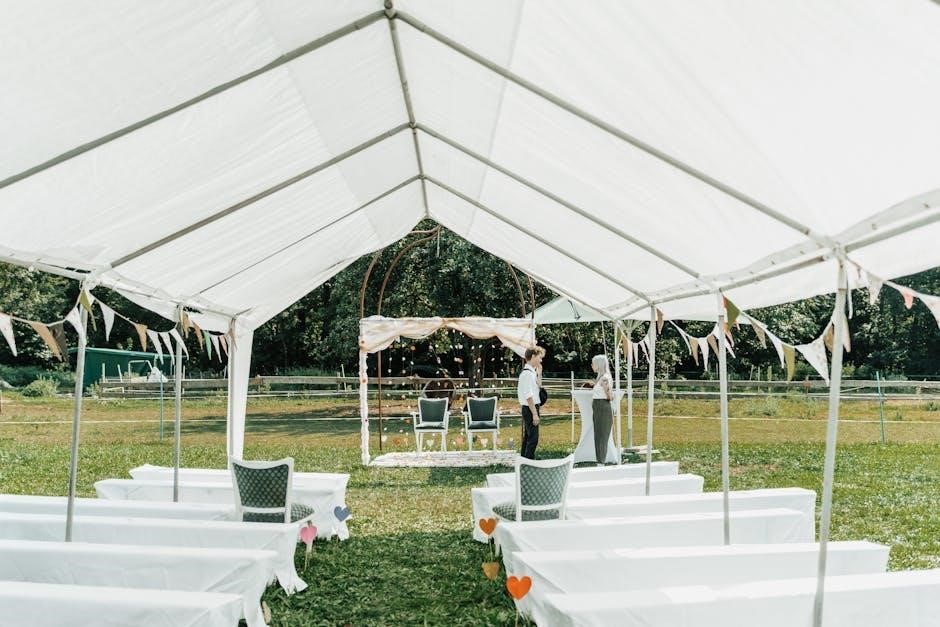
A party tent is a temporary structure designed to provide covered space for events, offering protection from the elements and creating a designated area for celebrations.
Benefits of Using a Party Tent
Utilizing a party tent ensures your event proceeds rain or shine, offering shade, shelter, and a defined space, enhancing guest comfort and enjoyment.
Types of Party Tents Available
Quictent offers diverse options, including regular frame tents, high peak tents, and pole tents, alongside various sidewalls like mesh, netting, or solid panels.
What is a Party Tent?
Party tents, readily available with instructions from resources like Quictent, are fundamentally temporary structures meticulously engineered to deliver covered outdoor spaces. These versatile shelters are designed to accommodate a wide spectrum of events, ranging from intimate backyard gatherings to expansive celebrations. They function as a protective barrier against the unpredictable whims of weather, shielding guests from both the scorching sun and unexpected rainfall.
Essentially, a party tent creates a defined and dedicated area for your event, enhancing the overall ambiance and ensuring guest comfort. Quictent’s offerings include various styles, such as frame tents, high peak designs, and traditional pole tents, each catering to different aesthetic preferences and functional requirements. Understanding the components, as detailed in their instructions, is key to successful setup.
Benefits of Using a Party Tent
Employing a party tent, with clear instructions available from Quictent, provides unparalleled peace of mind, guaranteeing your event can proceed seamlessly regardless of weather conditions. These tents offer crucial protection from the sun’s harsh rays and unexpected showers, ensuring guest comfort throughout the duration of your celebration. Beyond weatherproofing, a party tent establishes a clearly defined event space, enhancing organization and creating a more festive atmosphere.
Quictent’s range of tents and sidewalls (mesh, netting, solid) allows for customization to suit your specific needs. Following their instructions simplifies setup, transforming any outdoor area into a welcoming and sheltered environment. This adaptability makes party tents ideal for diverse occasions, maximizing enjoyment for both hosts and attendees.
Types of Party Tents Available
Quictent provides a comprehensive selection of party tents, each suited to different event styles and requirements. Instructions for assembly are readily available for their Regular Frame Tents, known for their ease of setup and stability. For a more striking aesthetic, Shaped High Peak Tents offer an elevated appearance, with detailed instructions guiding the process. Traditional Pole Tents provide a classic look, though may require more involved setup based on the provided guides.
Furthermore, Quictent offers customizable options with various sidewalls – Mesh Windows for ventilation, Netting Sidewalls for insect protection, and Solid sidewalls for complete enclosure. Accessing the correct instructions ensures a secure and well-fitted tent, maximizing its functionality and visual appeal.

Planning Your Party Tent Setup
Careful planning, referencing Quictent’s instructions, is crucial for a successful setup, ensuring adequate space, a suitable location, and adherence to local rules.
Choosing the Right Size Tent
Determine guest count and activity space to select a tent size that comfortably accommodates everyone, consulting size guides for accurate estimations.
Selecting the Ideal Location
Choose a level surface, free of obstructions, with consideration for wind direction and proximity to power sources for optimal tent placement.
Checking Local Regulations and Permits
Verify local ordinances regarding temporary structures, potentially requiring permits for tent size or event duration, ensuring full compliance.
Selecting the appropriate tent size is paramount for a comfortable and enjoyable event. Begin by accurately estimating your guest list; remember to account for seating arrangements, buffet tables, and any designated dance floor space. Quictent offers a variety of sizes, so understanding your needs is key.
Consider the tent’s capacity in terms of people it can comfortably hold. A general rule of thumb is to allow approximately 10-12 square feet per person. Don’t forget to factor in extra space for movement and potential event features. Referencing Quictent’s product descriptions and size guides will provide valuable insights.
Overestimating is generally preferable to underestimating, as a cramped tent can detract from the overall experience. Carefully assess your event layout and choose a size that provides ample room for all activities and guests, ensuring a relaxed and spacious atmosphere.
Choosing the right location for your party tent is crucial for stability and guest convenience. Opt for a level surface to prevent wobbling and ensure secure anchoring, whether using stakes or weight bags. Avoid areas prone to waterlogging, especially after rainfall.
Consider proximity to power sources if you plan to use lighting or entertainment equipment. Ensure sufficient space around the tent for guests to move freely and access entry/exit points. Check for overhead obstructions like tree branches or power lines.
Accessibility is key; select a location easily reachable for deliveries and guests, potentially considering parking availability. A well-chosen location enhances the overall event experience, providing a safe and comfortable environment.
Before erecting your party tent, it’s vital to investigate local regulations and permit requirements. Many municipalities have rules regarding temporary structures, especially concerning size, location, and duration of use. Ignoring these regulations can lead to fines or forced dismantling.
Contact your local city hall or homeowner’s association to inquire about necessary permits. Some areas may require permits for tents exceeding a certain size or if they obstruct public rights-of-way. Fire safety regulations might also apply, particularly regarding tent materials and exit access.
Compliance ensures a smooth and legal event, avoiding potential disruptions. Proactive research and permit acquisition demonstrate responsible event planning and respect for community guidelines.

Unboxing and Inventory
Carefully unpack your party tent and compare all components against the included parts list, ensuring nothing is missing before beginning assembly, as per Quictent’s guidance.
Identifying Tent Components
Familiarize yourself with each part – poles, canopy, stakes, and connectors – understanding their function will streamline the setup process significantly.
Checking for Missing Parts
Immediately report any missing or damaged components to the retailer to avoid delays and ensure a complete, functional party tent setup.
Familiarizing Yourself with the Instructions
Thoroughly review the instruction manual before starting, visualizing each step to prepare for a smooth and efficient tent assembly experience.
Identifying Tent Components
Before you begin assembling your party tent, a crucial step is to meticulously identify each component laid out before you. Quictent’s instructions emphasize understanding what each piece is and its specific role in the overall structure. The tent typically includes several types of poles – often color-coded for easier identification – forming the frame.
You’ll find vertical poles that provide height, and horizontal supports that create stability. The canopy itself, usually made of durable polyethylene, is a significant component. Don’t overlook the smaller parts: connectors, stakes for anchoring, ropes for tensioning, and potentially sidewalls for enclosure.
Sidewalls come in various materials like mesh, netting, or solid fabrics. Taking the time to recognize each part prevents confusion during assembly and ensures a smoother, more efficient setup process. Refer to the parts list in your manual to confirm you have everything needed.
Checking for Missing Parts
A thorough inventory is paramount before commencing party tent setup; Carefully compare the contents of the package against the parts list provided in Quictent’s instructions. Missing components can halt progress and cause frustration, so proactive checking is essential. Pay close attention to the number of poles – vertical, horizontal, and any specialized supports.
Verify the presence of all connectors, stakes (crucial for anchoring), ropes, and canopy clips. Sidewall quantities should also be confirmed if included with your tent. If any parts are absent, immediately contact Quictent’s customer support.
Do not attempt to substitute parts or proceed with assembly if something is missing; this could compromise the tent’s structural integrity. A complete inventory ensures a safe and successful event.
Familiarizing Yourself with the Instructions
Before you begin, dedicate time to thoroughly review Quictent’s party tent instructions. Understand the diagrams and step-by-step guidance; visualizing the process beforehand saves time and prevents errors. Pay attention to safety warnings and recommended assembly sequences. Note the specific terminology used for each component – poles, connectors, canopy, and sidewalls – to avoid confusion during setup.
Quictent’s instructions often include helpful illustrations. Study these carefully to grasp how parts connect and interact. Identify the different types of sidewalls (mesh, netting, solid) and their attachment methods;
A clear understanding of the instructions is key to a smooth and secure tent assembly.

Setting Up the Tent Frame
Constructing the frame involves assembling the base, raising vertical poles, and connecting roof supports, following Quictent’s instructions for a stable structure.
Assembling the Base Frame
Connect the frame pieces according to the instructions, ensuring a level and secure foundation for the entire tent structure.
Raising the Vertical Poles
Carefully raise and secure the vertical poles, attaching them to the base frame at designated points for optimal height and stability.
Connecting the Roof Supports
Attach the roof supports to the vertical poles, creating the tent’s upper structure and providing the framework for the canopy.
Assembling the Base Frame
Begin by laying out all base frame components on a clear, flat surface. Refer to the Quictent instructions to identify each piece – typically consisting of interconnected metal or plastic sections. Connect the frame sections using the provided connectors, ensuring a snug and secure fit. Double-check that all connections are properly locked or fastened, as this foundation is crucial for the tent’s overall stability.
Pay close attention to the orientation of each piece; some sections may be specifically designed for certain positions within the frame. Once assembled, carefully inspect the base frame for any bends, breaks, or missing components. A level base is essential, so adjust the frame as needed to compensate for uneven ground. This initial step sets the stage for a successful tent setup, guaranteeing a robust and reliable structure for your event.
Raising the Vertical Poles
With the base frame securely assembled, begin inserting the vertical poles into the designated corner sockets or connectors. These poles provide the tent’s height and structural support, so ensure they are fully seated and locked into place. Depending on the tent design, this may involve twisting the poles or using locking pins.
Raise each pole gradually and simultaneously, maintaining balance to prevent the frame from collapsing. If encountering resistance, double-check the base frame connections and pole alignment. Once all vertical poles are upright, carefully inspect their stability and ensure they are plumb – perfectly vertical. This step is critical for achieving the tent’s intended shape and preventing potential structural issues during use.
Connecting the Roof Supports
With the vertical poles securely in place, begin attaching the roof supports – typically straight or curved beams – to create the tent’s roof structure. These supports connect the tops of the vertical poles, forming a stable framework for the canopy. Connectors, clips, or sliding mechanisms are commonly used for this purpose, ensuring a snug and secure fit.
Work systematically around the tent, adding each roof support and verifying its connection before moving to the next. Ensure all supports are properly aligned and locked into position, creating a symmetrical and balanced roof structure. This step is crucial for distributing weight evenly and preventing sagging or collapse when the canopy is installed.

Attaching the Tent Canopy
Carefully drape the tent canopy over the assembled frame, ensuring even distribution. Secure it using clips, ties, or Velcro, creating a taut and weatherproof covering.
Drapping the Canopy Over the Frame
Gently unfold the canopy and position it over the tent frame, allowing it to settle evenly on all sides for optimal coverage and appearance.
Securing the Canopy to the Frame
Utilize the provided clips, ties, or Velcro straps to firmly attach the canopy to the frame, ensuring a secure and stable connection throughout.
Ensuring Proper Canopy Tension
Adjust the canopy’s position and tension to eliminate wrinkles and sagging, creating a smooth, taut surface that effectively resists wind and rain.
Drapping the Canopy Over the Frame
Begin by carefully unfolding the party tent canopy, laying it out in a spacious area to prevent tangling or damage. With assistance, gently lift the canopy and position it directly over the assembled tent frame. Ensure the canopy’s edges align with the frame’s perimeter, allowing for even distribution of the material.
As you drape the canopy, work systematically around the frame, letting the fabric settle naturally. Avoid pulling or stretching the canopy excessively, as this could strain the seams or attachment points. Pay attention to the canopy’s orientation, ensuring any designated patterns or markings are positioned as desired. A smooth, even drape is crucial for proper water runoff and overall stability.
Take your time during this step, as a well-draped canopy forms the foundation for a secure and aesthetically pleasing party tent setup. Proper draping minimizes stress on the frame and ensures the canopy effectively protects against the elements.
Securing the Canopy to the Frame
Once draped, secure the canopy to the tent frame using the provided clips, hooks, or ties. Begin at one corner and work your way around the perimeter, ensuring each attachment point is firmly fastened. These connectors are designed to withstand wind and weather, so ensure they are properly engaged.
Pay close attention to the canopy’s tension as you secure it. The canopy should be taut but not overly stretched, preventing wrinkles and ensuring effective water runoff. Avoid creating excessive strain on any single attachment point. Regularly check each connection to confirm it remains secure throughout the process.
A properly secured canopy is vital for the tent’s stability and safety. Double-check all attachment points before proceeding to the next setup stage, guaranteeing a robust and reliable shelter.
Ensuring Proper Canopy Tension
Achieving correct canopy tension is crucial for a stable and aesthetically pleasing party tent. The canopy should be stretched smoothly across the frame, eliminating significant sags or wrinkles. Uneven tension can lead to water pooling during rain or stress on the frame.
Adjust the canopy’s position and re-secure attachment points as needed to distribute tension evenly. If the canopy feels too tight, slightly loosen the connections; if it’s too loose, tighten them. Consistent tension prevents flapping in the wind and enhances the tent’s overall durability.
Regularly inspect the canopy for any signs of strain or loosening, especially after initial setup and during inclement weather. Maintaining proper tension ensures a safe and comfortable event space.

Sidewall Installation
Sidewalls, available in mesh, netting, or solid options from Quictent, easily attach to the tent frame, providing enclosure and protection from the elements.
Attaching Sidewalls to the Frame
Secure sidewalls using provided hooks, ties, or Velcro straps, connecting them firmly to the tent frame’s uprights and supports for stability.
Different Types of Sidewalls (Mesh, Netting, Solid)
Choose sidewalls based on your needs: mesh for ventilation, netting for insect control, or solid for complete enclosure and weather protection.
Securing Sidewalls for Stability
Ensure sidewalls are taut and properly anchored to prevent flapping or detachment, especially in windy conditions, for a secure event space.
Attaching Sidewalls to the Frame
Securing sidewalls to your party tent frame is a crucial step for creating a fully enclosed and protected event space. Quictent sidewalls are designed for straightforward attachment, typically utilizing a combination of hooks, ties, or durable Velcro straps. Begin by aligning the sidewall’s edge with the tent frame’s uprights or supports.
Carefully attach the hooks or straps, ensuring a snug and secure fit. For tie-down points, thread the provided ties through the grommets on the sidewall and around the frame, tightening them firmly. Regularly check all connections to confirm they remain secure, especially if the weather conditions become unfavorable. Proper attachment prevents flapping and ensures the sidewalls effectively block wind and rain, enhancing your event’s comfort and safety.
Remember to work systematically around the tent, attaching each sidewall section progressively for optimal stability and a professional finish.
Different Types of Sidewalls (Mesh, Netting, Solid)
Quictent offers a variety of sidewalls to customize your party tent, each serving a unique purpose. Mesh sidewalls provide excellent ventilation while offering some protection from sun and insects, ideal for warmer climates. Netting sidewalls offer similar benefits, creating a more open-air feel while keeping bugs at bay.
Solid sidewalls deliver complete enclosure, shielding from wind, rain, and sun, providing privacy and a more controlled environment. Choosing the right sidewall depends on your event’s needs and the prevailing weather conditions. You can even mix and match sidewall types to create a customized setup, maximizing comfort and functionality. Consider the level of privacy and protection required when making your selection.
These options allow for adaptable event spaces.
Securing Sidewalls for Stability
Properly securing sidewalls is crucial for party tent stability, especially in windy conditions. Most sidewalls attach to the tent frame using Velcro straps, buckles, or ties, ensuring a snug fit. Regularly inspect these connections throughout the event to confirm they remain secure.
For added stability, utilize ropes and stakes to anchor the bottom of the sidewalls to the ground, creating a more robust barrier against the elements. Ensure stakes are driven firmly into the ground at an angle, providing maximum holding power. Reinforcing sidewalls prevents flapping and potential damage, safeguarding your event and guests.
A secure setup guarantees peace of mind.

Anchoring the Tent
Secure anchoring is vital for tent safety, utilizing stakes for ground surfaces or weight bags for hard areas, preventing shifting or collapse.
Using Stakes for Ground Anchoring
Drive stakes at a 45-degree angle away from the tent, ensuring deep penetration into the ground for maximum holding power and stability.
Utilizing Weight Bags for Hard Surfaces
Weight bags, filled with sand or water, provide a secure anchor on concrete or asphalt, effectively stabilizing the tent against wind.
Importance of Secure Anchoring
Proper anchoring prevents tent movement, protecting guests and the structure from damage during inclement weather, ensuring a safe event.
Using Stakes for Ground Anchoring
Ground anchoring with stakes is a fundamental step in securing your party tent, especially on grassy or soft soil surfaces. Begin by identifying the designated stake points around the tent’s perimeter, typically reinforced loops or grommets on the tent’s legs or frame.
Insert the stakes into the ground at a 45-degree angle, pointing away from the tent itself. This angle maximizes the holding power, resisting both upward and sideways forces. Ensure the stakes are driven deep enough into the ground – ideally, leaving only a few inches exposed – to achieve a firm grip.
For particularly soft ground, consider using longer or wider stakes for enhanced stability. Regularly check the stakes throughout the event, especially if wind conditions change, to ensure they remain securely anchored. A properly staked tent provides a safe and enjoyable environment for your guests.
Utilizing Weight Bags for Hard Surfaces
When setting up a party tent on surfaces like concrete, patios, or decks where staking isn’t feasible, weight bags become essential for secure anchoring. These bags, typically made of durable nylon or polyester, are filled with sand, water, or other heavy materials to provide substantial weight and stability.
Distribute the weight bags evenly around the tent’s legs, attaching them securely using straps or ropes provided with the tent or purchased separately. Ensure each leg has adequate weight to counteract potential uplift from wind.
The amount of weight needed depends on the tent’s size and expected wind conditions; heavier tents and windier environments require more weight. Regularly inspect the bags to confirm they remain full and securely attached throughout the event, guaranteeing a safe setup.
Importance of Secure Anchoring
Secure anchoring is paramount when erecting a party tent, directly impacting its stability and safety, especially in unpredictable weather. Insufficient anchoring can lead to the tent collapsing, causing potential injury to guests and damage to property.
Whether utilizing stakes for ground anchoring or weight bags on hard surfaces, a robust connection between the tent and the ground is crucial. Regularly inspect all anchor points throughout the event, particularly if wind conditions change.
Prioritize safety by ensuring the tent is firmly secured before guests arrive, providing a worry-free environment for your celebration. A well-anchored tent offers peace of mind and protects your investment.
Maintaining Your Party Tent
Proper maintenance extends your tent’s life; cleaning, careful storage, and prompt damage inspection are key, ensuring it’s ready for future events.
Cleaning and Storage
Thoroughly clean and completely dry your party tent before storing it to prevent mildew and extend its lifespan, safeguarding your investment.
Inspecting for Damage
Regularly inspect the canopy, frame, and sidewalls for tears, rust, or broken parts, addressing issues promptly to maintain structural integrity.
Repairing Minor Issues
Small tears can be patched, and loose connections tightened, preventing minor problems from escalating into costly repairs or compromising safety.
Cleaning and Storage
Proper cleaning and storage are crucial for maintaining the longevity and condition of your party tent. After each use, especially following exposure to rain or damp conditions, it’s essential to thoroughly clean all components. Begin by removing any dirt, leaves, or debris from the canopy and sidewalls using a soft brush or damp cloth.
Avoid harsh chemicals or abrasive cleaners, as these can damage the tent’s material. Once cleaned, ensure the tent is completely dry before storing it. Moisture can lead to mildew and deterioration. Spread the canopy and sidewalls out in a well-ventilated area, or allow them to air dry completely.
When storing, fold the tent loosely to prevent creasing and damage. Store it in a cool, dry place, away from direct sunlight and extreme temperatures. The original storage bag is ideal, but ensure it’s not overly compressed. Following these steps will help keep your party tent in excellent condition for years to come.
Inspecting for Damage
Regular inspection is vital to ensure your party tent remains safe and functional. After each use and before storage, carefully examine all components for any signs of wear and tear. Start with the canopy, checking for rips, tears, or discoloration. Inspect the frame for bent or broken poles, and ensure all connectors are secure.
Pay close attention to the sidewalls, looking for damage to the mesh, netting, or solid panels. Check the anchoring points – stakes and weight bags – for any signs of bending or breakage. Early detection of damage prevents minor issues from escalating into costly repairs or safety hazards.
Document any damage found, and address it promptly. Small tears can often be patched, while broken poles may need replacement. Consistent inspection extends the life of your tent and guarantees a secure setup for future events.
Repairing Minor Issues
Addressing small problems promptly can significantly extend your party tent’s lifespan. For minor canopy tears, utilize a durable patching kit specifically designed for tent materials. Ensure the area is clean and dry before applying the patch, following the kit’s instructions carefully. Bent poles can sometimes be gently straightened, but avoid excessive force that could cause breakage.
Loose connectors can often be tightened with basic tools. If stakes are bent, replace them with new ones to maintain secure anchoring. Regular maintenance prevents minor issues from becoming major repairs. Keep a small repair kit readily available for quick fixes during or after events.
For more complex damage, consider consulting a professional tent repair service to ensure a safe and lasting solution.