Battery charger manuals are vital for safe and effective operation, offering troubleshooting guidance for issues like overheating or incorrect voltage.
Understanding these guides ensures proper use and extends the charger’s lifespan, preventing potential hazards and maximizing battery performance.
Understanding the Importance of a Manual
A battery charger manual isn’t merely a set of instructions; it’s a crucial safety guide and performance optimizer. Ignoring it risks damaging the charger, the battery, or even causing personal injury. Manuals detail specific charger features, proper connection procedures, and troubleshooting steps for common issues like a charger failing to power on or displaying erroneous warnings.
They explain how to interpret digital displays, select correct voltage and amperage settings, and understand different charging modes. Furthermore, manuals provide vital information regarding warranty coverage and customer support contact details, ensuring users can resolve any problems effectively and safely.
Types of Battery Chargers Covered
Battery charger manuals often cater to a diverse range of charger types. This includes traditional open-type 24V chargers, commonly used for automotive applications, and more advanced, digitally-controlled models. Manuals also address smart chargers capable of automatically adjusting charging parameters based on battery type and condition.
Lithium-ion specific chargers, with their unique Battery Management System (BMS) considerations, require dedicated guidance. Manuals will detail compatibility with various battery chemistries and explain how to interpret BMS protection states. Understanding these distinctions is crucial for optimal charging and battery longevity.
Safety Precautions
Always prioritize safety when using a battery charger; avoid electrical hazards and follow guidelines to prevent overheating or damage to equipment.
General Safety Guidelines
Before operating any battery charger, carefully review the manual for specific instructions and warnings. Ensure the charging area is well-ventilated to prevent the buildup of potentially explosive gases released during charging. Never charge a damaged battery, as it could rupture or leak corrosive materials.
Always disconnect the charger from the AC power source before making any connections or disconnections to the battery. Avoid creating sparks near the battery, and never smoke or use open flames in the charging area. Wear appropriate eye protection, such as safety glasses, to shield against potential splashes or fumes.
Keep the charger dry and away from flammable materials. Regularly inspect cables and clamps for damage, and replace them if necessary.
Specific Charger Safety Features
Modern battery chargers incorporate several safety features to protect both the user and the battery. Many models include over-current protection, which automatically shuts off the charger if the battery draws excessive current. Over-voltage protection prevents damage from excessively high voltage levels.
Reverse polarity protection safeguards against incorrect connections, while short-circuit protection prevents damage in case of a short circuit. Some chargers also feature thermal protection, shutting down if the unit overheats. Lithium-ion chargers often integrate Battery Management System (BMS) communication for optimized charging and safety.
Always verify these features are functioning correctly before each use.
Avoiding Electrical Hazards
To prevent electrical shock, always ensure the charger and battery are used in a well-ventilated area, free from flammable materials. Never operate the charger with damaged cords or plugs; replace them immediately. Avoid contact with exposed terminals and always disconnect the charger before inspecting or cleaning it.
Do not use the charger in wet or damp conditions. Ensure the power outlet is properly grounded. Never attempt to modify the charger or use it for unintended purposes. Always follow the manufacturer’s instructions regarding proper grounding and fuse ratings.
Understanding Charger Components
Key components include the AC input, DC output clamps, voltage/amperage settings, and digital displays—all crucial for safe and effective battery charging operations.
AC Input and Power Cord
The AC input receives power from a standard wall outlet, typically requiring the correct voltage to function properly. Inspect the power cord regularly for any signs of damage, such as cuts, fraying, or exposed wires, as these pose a significant electrical shock hazard.
Ensure the cord is fully inserted into both the charger and the outlet. Avoid using extension cords if possible, but if necessary, use a heavy-duty cord rated for the charger’s amperage. A damaged power cord must be replaced immediately to prevent potential fire or electrical hazards. Always disconnect the charger before inspecting or replacing the cord.
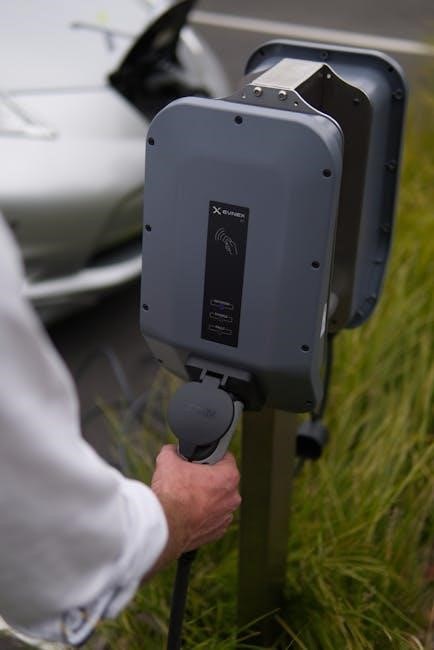
DC Output Clamps and Connectors
DC output clamps establish the connection to the battery terminals, requiring careful attention to polarity – red for positive (+) and black for negative (-). Securely attach the clamps, ensuring a clean metal-to-metal contact for efficient charging. Poor connections can cause sparking, overheating, and reduced charging effectiveness.
Inspect connectors for corrosion or damage before each use. Different chargers utilize various connector types; confirm compatibility with your battery. Never attempt to modify connectors. Always disconnect the clamps from the battery before disconnecting the AC power cord to prevent short circuits.
Voltage and Amperage Settings
Correct voltage selection is paramount; matching the charger’s voltage to the battery’s nominal voltage (e.g., 12V, 24V) prevents damage. Amperage controls the charging rate – higher amperage means faster charging, but can overheat batteries. Start with a lower amperage setting and increase gradually if needed.
Refer to the battery manufacturer’s recommendations for optimal charging amperage. Incorrect settings can lead to undercharging or overcharging, reducing battery life. Some chargers automatically adjust amperage based on battery condition.
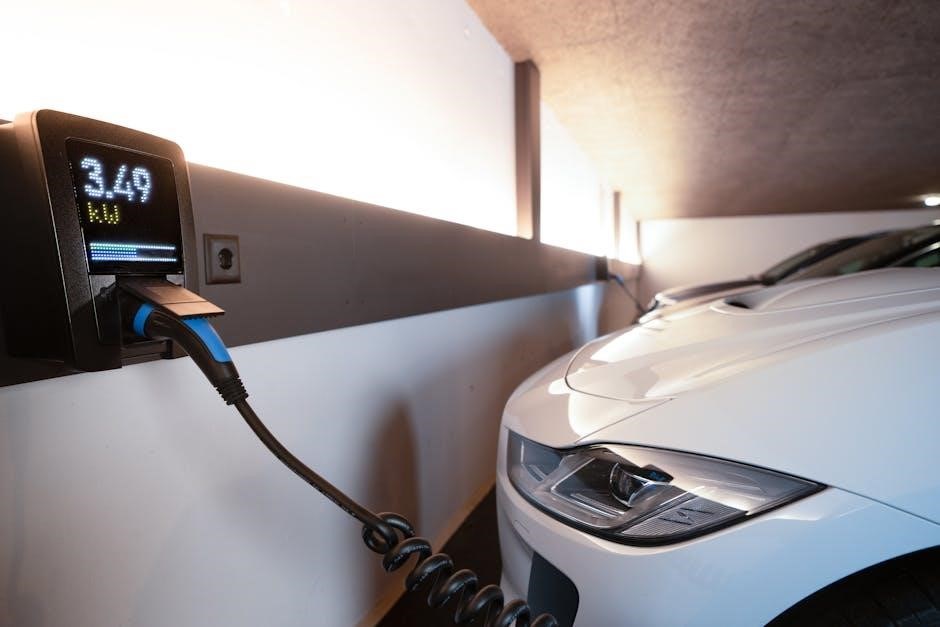
Digital Display and Indicators
Digital displays show crucial information like voltage and amperage levels during charging, allowing for monitoring of the process. LED indicators often signal charging status (charging, full, error). Error codes displayed require referencing the manual for specific troubleshooting steps.
Understanding these indicators is vital for diagnosing issues. A lack of charging indication, or the appearance of an error code, necessitates consulting the manual for guidance. Regularly checking the display ensures optimal charging and prevents potential problems.
Troubleshooting Common Issues
Common charger problems include failing to power on, no charging indication, overheating, and erroneous digital warnings; the manual provides solutions.
Charger Not Powering On
If the charger fails to power on, first verify the AC power cord is securely connected to both the charger and a functioning wall outlet. Check for tripped circuit breakers or blown fuses in the electrical circuit.
Ensure the battery clamps aren’t shorted or touching each other before connecting to the power source. A lack of the usual humming noise suggests a potential internal fault, requiring further investigation or professional repair. The manual details these checks, emphasizing safety before troubleshooting.
No Charging Indication
When no charging indication appears, despite the charger being powered on, confirm a solid connection between the clamps and the battery terminals. Inspect the battery terminals for corrosion or debris, hindering electrical contact.
Verify the selected voltage and amperage settings on the charger match the battery’s specifications. A failed battery, or one in a BMS protection state (like low temperature), can also prevent charging. Consult the manual for specific error codes or diagnostic steps.
Overheating Problems
If the charger overheats, immediately disconnect it from both the battery and the power source. Ensure adequate ventilation around the charger; avoid enclosing it or placing it in a confined space. Overheating can indicate a faulty charger, a damaged battery, or incorrect settings.
Inspect the cooling fan (if equipped) for obstructions or failure. Refer to the manual for specific temperature limits and troubleshooting steps. Continuing to use an overheating charger poses a fire risk and can damage the battery.
Erroneous Digital Warnings
Digital displays can show error codes that don’t accurately reflect the problem. First, double-check all connections – battery clamps, AC power cord – ensuring they are secure. Cycle the charger off and on; sometimes, a simple reset clears the false reading.
Consult the manual’s error code list to understand the displayed message, but consider it potentially inaccurate. If the warning persists despite verification, suspect an internal charger fault and discontinue use.
Battery Related Troubleshooting
Battery issues often mimic charger failures; confirm compatibility, check for sulfation, and address BMS protections like low-temperature or over-current states.
Identifying Battery Type Compatibility
Ensuring compatibility between your battery charger and the battery type is paramount for safe and effective charging. Using the incorrect charger can lead to reduced battery life, permanent damage, or even pose a safety hazard. Different battery chemistries – lead-acid, lithium-ion, and others – require specific charging profiles.
Always consult both the battery and charger manuals to verify compatibility before connecting. The manual will clearly state the supported battery types and any limitations. Incorrect battery type usage is a frequently cited cause of charger malfunctions and battery failures, so diligent verification is crucial.
Failure to adhere to these guidelines can void warranties and create dangerous situations.
Dealing with Sulfated Batteries
Sulfation occurs when lead-acid batteries are left discharged for extended periods, forming lead sulfate crystals that impede charging. A manual may offer a “desulfation” or “recovery” mode, applying a higher voltage pulse to break down these crystals. However, success isn’t guaranteed, especially with severely sulfated batteries.
These modes often take longer and may not fully restore capacity. Repeated deep discharges significantly accelerate sulfation. If a battery remains unresponsive after several desulfation attempts, it likely requires replacement. Always consult the charger manual for specific desulfation instructions and limitations.
Attempting to force charge a heavily sulfated battery can generate excessive heat and potentially cause damage.
Low Temperature Protection Issues
Low-temperature protection prevents charging batteries in freezing conditions, as charging can cause damage. Many modern chargers, particularly those for lithium-ion batteries, incorporate this feature. If charging fails, the manual advises checking if the battery temperature is within the acceptable range.
The DC Home APP, for Renogy batteries, can confirm if low-temperature protection is active. Warming the battery to a suitable temperature often resolves this. Attempting to override this protection can lead to permanent battery damage or reduced lifespan. Refer to the manual for specific temperature thresholds.
Over-Current Protection Activation
Over-current protection safeguards the charger and battery from excessive current draw, a common safety feature. If activated, charging will halt. The manual instructs users to first verify the battery’s health and compatibility with the charger’s output. A failing battery can trigger this protection.
Renogy’s DC Home APP can identify if the battery’s BMS (Battery Management System) has initiated over-current protection. Reducing the charging amperage or replacing a damaged battery may resolve the issue. Ignoring this protection can result in charger failure or battery damage.

Advanced Troubleshooting
Advanced diagnostics involve checking for loose connections, verifying correct output voltage, and identifying potential short circuits to restore charger functionality.
Checking for Loose Connections
Begin by visually inspecting all cable connections – the AC power cord at both the charger and wall outlet, and the DC output clamps connected to the battery terminals. Gently tug on each connection to confirm a secure fit; any movement indicates looseness.
Loose connections can interrupt the charging process and cause intermittent power delivery, leading to inaccurate readings or a complete failure to charge. Ensure clamps are firmly attached to clean metal surfaces on the battery posts, free from corrosion. A poor connection creates resistance, generating heat and potentially damaging the charger or battery.
If corrosion is present, carefully clean the terminals and clamps before reconnecting; Tighten any loose screws or bolts securing the connections, but avoid over-tightening, which could strip the threads.
Incorrect Output Voltage Diagnosis
Utilize a multimeter to accurately measure the DC output voltage of the charger, comparing it to the battery’s required voltage. Disconnect the charger from the battery before testing to avoid inaccurate readings. An incorrect output voltage – too high or too low – can severely damage the battery or prevent charging altogether.
Temperature compensation can affect output voltage; some chargers adjust voltage based on ambient temperature. Verify the charger is functioning within its specified temperature range. If the voltage remains incorrect despite proper settings, the charger may have an internal fault requiring professional repair or replacement.
Always consult the charger’s manual for acceptable voltage tolerances.
Short Circuit Detection
Modern battery chargers often incorporate short circuit protection, immediately halting output if a short is detected. A short circuit presents a significant safety hazard, potentially causing overheating, fire, or damage to both the charger and the battery. If the charger detects a short, it will typically display an error code or indicator light.
Before assuming a charger fault, meticulously inspect the battery cables and clamps for damage or loose connections that could create a short. Ensure proper polarity – positive to positive, negative to negative – is maintained. If no visible issues are found, the battery itself may be internally shorted.
Never attempt to bypass or disable short circuit protection.
Disconnected Main Power Issues
A charger failing to operate despite being connected to a seemingly functional power outlet often points to a disconnected main power source. First, verify the outlet is actively supplying power by testing it with another device. Check the charger’s power cord for any visible damage, such as cuts or exposed wires.
Inspect the plug itself, ensuring it’s fully inserted into the outlet. If using an extension cord, confirm it’s rated for the charger’s power requirements and is functioning correctly. A tripped circuit breaker or blown fuse can also interrupt power.
Reset breakers or replace fuses as needed.
Reading Charger Displays
Digital displays show crucial information like voltage, amperage, and error codes, enabling users to monitor charging progress and diagnose potential issues effectively.
Interpreting Voltage Readings
Voltage readings on your battery charger display indicate the electrical potential difference between the charger and the battery. A stable voltage close to the battery’s nominal voltage (e.g., 12V or 24V) suggests a healthy connection and proper charging.
However, a significantly lower voltage might indicate a weak battery, poor connection, or a failing charger. Conversely, a voltage exceeding the battery’s rating could signify a charger malfunction or incorrect settings. Monitoring voltage fluctuations during charging provides insights into the battery’s acceptance rate and overall health, aiding in accurate diagnosis.
Understanding Amperage Readings
Amperage readings on a battery charger display represent the current flowing into the battery, measured in Amperes (amps). Higher amperage generally means faster charging, but exceeding the battery’s recommended rate can cause damage.
Initially, a battery will draw higher amperage, which gradually decreases as it nears full charge. A consistently low amperage reading might indicate a sulfated battery, a poor connection, or a charger issue. Monitoring amperage helps determine the charging rate and identify potential problems during the process.
Decoding Error Codes
Error codes displayed on modern battery chargers signal specific issues requiring attention. These alphanumeric codes, detailed in the charger’s manual, pinpoint problems like reverse polarity, overvoltage, or a faulty battery.
Ignoring error codes can lead to battery damage or charger malfunction. Consult the manual to understand each code’s meaning and recommended action. Common errors include BMS protection states in lithium-ion batteries, indicating temperature or current limits have been reached, requiring troubleshooting before resuming charging.
Charger Settings and Modes
Selecting the correct voltage and amperage is crucial for optimal charging. Different modes, like trickle or fast charge, cater to specific battery needs and conditions.
Selecting the Correct Voltage
Ensuring the charger’s voltage precisely matches the battery’s requirement is paramount for safe and efficient charging. Utilizing an incorrect voltage can lead to undercharging, causing reduced battery capacity, or, more critically, overcharging, potentially damaging the battery and creating a safety hazard.
Consult the battery’s label or documentation to determine its nominal voltage. Most automotive batteries are 12V, but other types, like those used in motorcycles or electric vehicles, may differ. Always double-check before connecting the charger, and if unsure, consult a qualified technician.
Incorrect voltage settings can void warranties and compromise battery life.
Choosing the Appropriate Amperage
Selecting the correct amperage is crucial for optimal charging speed and battery health. While a higher amperage can charge a battery faster, exceeding the battery’s recommended rate can generate excessive heat, potentially damaging the battery or even causing a fire.
Generally, a charging rate of 10-15% of the battery’s amp-hour (Ah) capacity is considered safe. For example, a 100Ah battery should ideally be charged at 10-15 amps. Many modern chargers offer automatic amperage adjustment, simplifying this process.
Always prioritize a slower, safer charge over a rapid, potentially damaging one.

Understanding Different Charging Modes (e.g., Trickle, Fast Charge)
Battery chargers offer various modes tailored to different needs. “Fast Charge” delivers maximum amperage for quick replenishment, suitable for deeply discharged batteries, but requires careful monitoring to avoid overheating. “Trickle Charge” provides a low, sustained current to maintain a fully charged battery without overcharging, ideal for long-term storage.
Some chargers include “Maintenance” or “Float” modes, similar to trickle charging, while others offer specialized modes for specific battery types like lithium-ion. Selecting the appropriate mode ensures optimal battery life and performance.

Maintenance and Care
Regular cleaning, proper storage, and cable/clamp inspection are crucial for maintaining charger functionality and longevity, ensuring safe and efficient operation.
Cleaning the Charger
Maintaining a clean charger is essential for optimal performance and safety. Before any cleaning procedure, always disconnect the charger from both the AC power source and the battery to prevent electrical shock. Use a dry cloth to wipe down the exterior casing, removing any dust, dirt, or debris that may have accumulated.
Avoid using water or solvents, as these can damage internal components. For stubborn grime, a slightly damp cloth may be used, but ensure the charger is completely dry before reconnecting it. Pay particular attention to the clamps and connectors, ensuring they are free from corrosion. Regular cleaning helps prevent overheating and ensures reliable operation.
Storing the Charger Properly
Proper storage extends the life of your battery charger and ensures it’s ready when needed. Always disconnect the charger from both the power source and the battery before storing it. Choose a cool, dry location, away from direct sunlight and extreme temperatures. Avoid storing the charger in damp or humid environments, as this can lead to corrosion.
Coil the power cord neatly to prevent damage and tangling. If possible, store the charger in its original packaging or a protective case. Regularly inspect the cables and clamps for any signs of wear or damage before each use, ensuring safe operation.
Inspecting Cables and Clamps
Regular inspection of cables and clamps is crucial for safe and efficient charging. Before each use, carefully examine the power cord for any cuts, fraying, or exposed wires. Check the DC output clamps for corrosion, cracks, or loose connections. Ensure the clamps grip securely and provide a solid electrical contact.
Damaged cables or clamps should be replaced immediately to prevent electrical shock or fire hazards. A visual check can identify potential problems before they escalate, maintaining charger functionality and user safety. Prioritize preventative maintenance for longevity.

Lithium-ion Battery Specifics
Lithium-ion batteries require specific chargers; BMS protection states (low-temperature, over-current) can halt charging, demanding parameter confirmation for optimal performance.
BMS Protection States
Battery Management Systems (BMS) within lithium-ion batteries actively monitor and protect against various conditions. These protections, when triggered, will prevent the battery from accepting a charge, appearing as a charging failure.
Common states include low-temperature protection, halting charging in cold environments to prevent damage, and over-current protection, which stops charging if the current draw exceeds safe limits.
Utilizing a DC Home APP, or similar diagnostic tool, allows users to check for these active BMS states, identifying the root cause of charging issues and guiding appropriate corrective actions before proceeding with further troubleshooting steps.
Charger and Parameter Mismatch
Incompatibility between the charger and battery parameters can prevent successful charging. This occurs when the charger’s voltage or current settings don’t align with the battery’s specifications.
Using an incorrect charger, or improperly configured settings, can lead to inefficient charging, battery damage, or even safety hazards.
Confirming the charger’s output voltage and amperage match the battery’s requirements is crucial. Always consult both the charger and battery documentation to ensure a compatible and safe charging process.

Using a Multimeter for Diagnosis
A multimeter is essential for verifying battery voltage and charger output, aiding in pinpointing issues when a charger fails to operate correctly.
Checking Battery Voltage
Before initiating any charging process, utilize a multimeter to accurately assess the battery’s existing voltage level. This crucial step helps determine the battery’s state of charge and identifies potential issues preventing it from accepting a charge.
Connect the multimeter’s positive lead to the battery’s positive terminal and the negative lead to the negative terminal. A reading significantly below the battery’s nominal voltage indicates a deeply discharged or potentially damaged battery. Comparing this reading to the charger’s specifications ensures compatibility and prevents overcharging, extending battery life and maintaining optimal performance.
Testing Charger Output
To verify the charger’s functionality, disconnect it from the battery but keep it plugged into the mains power source. Carefully use a multimeter to measure the DC output voltage at the charger’s clamps or connectors.
Ensure the multimeter is set to the appropriate DC voltage range. The measured voltage should closely match the charger’s specified output voltage. Significant deviations indicate a potential charger malfunction, such as a faulty transformer or regulator, requiring professional repair or replacement to avoid damaging the battery.
Warranty Information
Review your charger’s warranty details for coverage duration and limitations. Contact customer support for assistance with claims or questions regarding the warranty terms.
Understanding Warranty Coverage
Carefully examine the warranty documentation accompanying your battery charger. Most warranties cover defects in materials and workmanship for a specified period, typically ranging from one to several years.
However, coverage often excludes damage resulting from misuse, accidents, unauthorized repairs, or normal wear and tear.
Specifically, the warranty likely won’t cover issues arising from improper battery connection, incorrect voltage selection, or failure to follow safety guidelines outlined in the manual.
Keep your proof of purchase, as it’s essential for validating any warranty claim.
Contacting Customer Support
If you encounter issues not addressed in the manual, or require assistance with warranty claims, contacting customer support is crucial. Locate the manufacturer’s contact information – typically found on their website, within the manual itself, or on the charger’s packaging.
Be prepared to provide your charger’s model number, serial number, and a detailed description of the problem.
Having your proof of purchase readily available will expedite the process.
Many manufacturers offer support via phone, email, or online chat, ensuring convenient access to assistance.